
Imagine walking into your kitchen and seeing a stunning end grain cutting board resting on your countertop. Not only does it serve as a practical tool for your culinary adventures, but it also adds a touch of craftsmanship and beauty to your space.
If you’ve been dreaming of creating such a masterpiece with your own hands, you’re in the right place. Building an end grain cutting board is easier than you might think, and the satisfaction of using a piece you’ve crafted yourself is unbeatable.
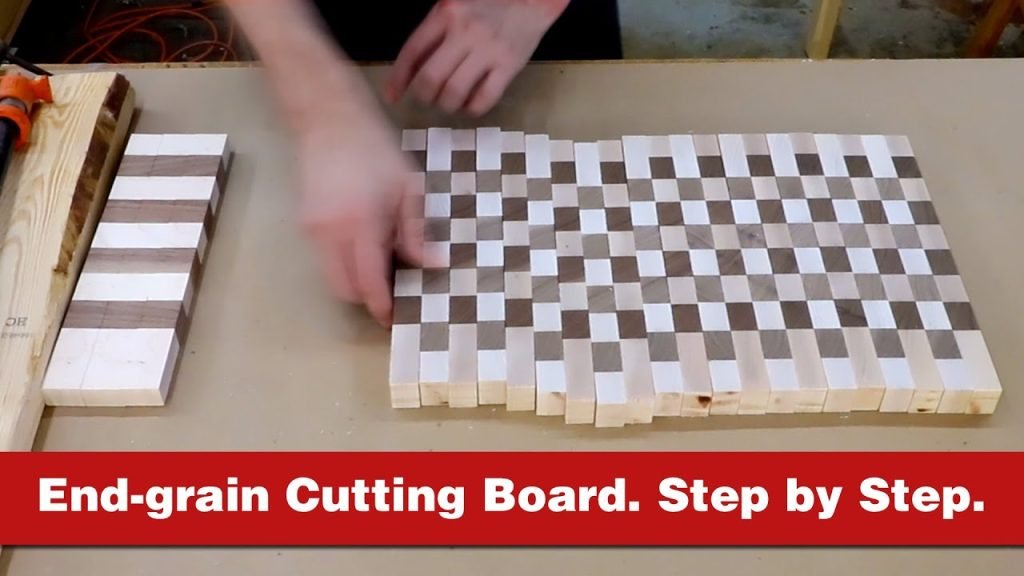
You’ll learn step-by-step how to make your own end grain cutting board. We’ll guide you through the materials you’ll need, the techniques to employ, and the tips that will ensure your project is a success. Whether you’re a seasoned DIY enthusiast or a beginner looking to try something new, this guide is tailored for you. Get ready to dive into a rewarding project that not only sharpens your woodworking skills but also enriches your kitchen with a personalized touch. Keep reading, and soon you’ll be slicing and dicing on your very own handmade cutting board.
Credit: www.thenavagepatch.com
Materials And Tools Needed
Building an end grain cutting board is a rewarding project. It requires precision and the right materials and tools. Having the correct supplies ensures a smooth process. It results in a durable and beautiful cutting board. This guide will help you gather what you need.
Wood Selection
Choose hardwoods like maple, walnut, or cherry. They are durable and have a beautiful grain. Select pieces free from knots and cracks. The wood should be thick and sturdy.
Adhesives
Use food-safe wood glue. It ensures pieces stay together. Opt for waterproof glue to withstand moisture. Good quality glue enhances longevity.
Sanding Tools
Get an orbital sander for smooth surfaces. Sanding blocks help with finer details. Sandpaper in various grits is essential. Start with coarse grit and end with fine grit.
Saws
A table saw cuts wood precisely. A miter saw helps with angled cuts. Ensure blades are sharp for clean cuts. Safety gear is crucial when using saws.
Clamps
Use bar clamps to hold wood during gluing. They apply even pressure. Choose clamps that fit your board size. Ensure they are sturdy and reliable.
Measuring Tools
A tape measure ensures accurate dimensions. A carpenter’s square is useful for right angles. Precision in measurement leads to a perfect board.
Finishing Supplies
Use food-safe mineral oil for finishing. It protects the wood and enhances beauty. Beeswax can be added for extra shine. Apply in thin coats for best results.

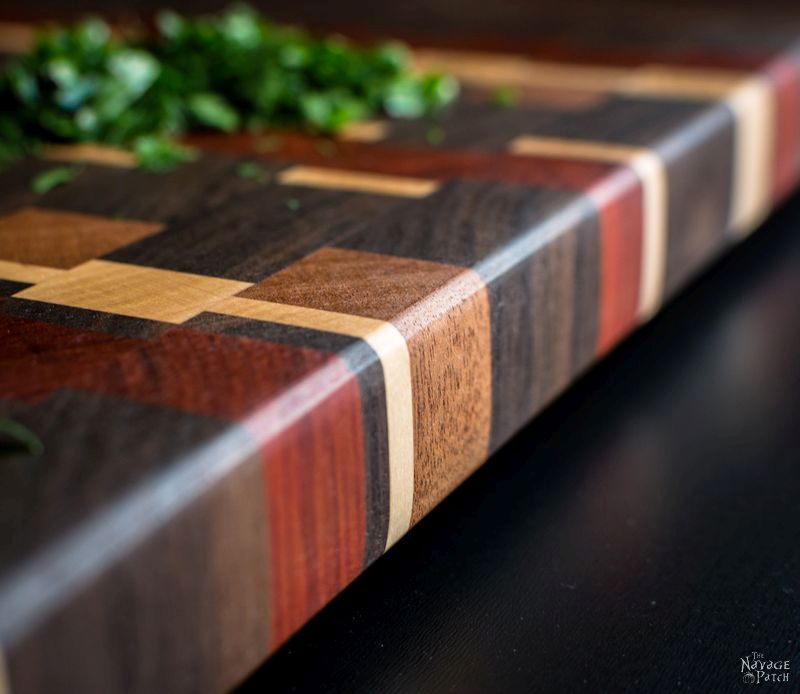
Credit: www.instructables.com
Choosing The Right Wood
Choosing the right wood is crucial for a quality end grain cutting board. The wood type affects the board’s durability and appearance. It also impacts how well the board withstands knife marks. Understanding different woods helps in making the best choice.
Hardwood Vs. Softwood
Hardwoods are dense and durable. They come from broad-leaved trees. Examples include maple, walnut, and cherry. Softwoods are less dense. They come from coniferous trees like pine and fir. Hardwoods are usually better for cutting boards. They resist scratches and last longer.
Wood Grain Pattern
Wood grain affects a board’s look and function. End grain boards show tree rings. They have a checkerboard pattern. This design is gentle on knives. It also hides cuts and scratches well.
Wood Toxicity
Some woods can be toxic. Avoid these for cutting boards. Woods like walnut and maple are safe. They do not release harmful substances. This makes them ideal for kitchen use.
Sustainability
Sustainable wood choices support the environment. Look for FSC-certified wood. This ensures responsible forest management. Bamboo is another eco-friendly choice. It grows quickly and is renewable.
Aesthetic Appeal
Different woods offer unique colors and patterns. Maple is light and clean. Walnut gives a rich, dark finish. Cherry adds warmth with its reddish hue. Mixing woods can create beautiful contrasts.
Design And Layout Planning
Crafting an end grain cutting board begins with thoughtful design and layout planning. Select wood pieces with complementary colors and grains. Arrange them in a pattern that enhances both aesthetics and durability.
Design and layout planning are essential steps in crafting a beautiful and functional end grain cutting board. The choices you make at this stage can elevate your project from simple to stunning. It’s not just about aesthetics; a well-thought-out design ensures durability and usability too. Your cutting board’s longevity and appearance depend on the wood you select. Opt for hardwoods like maple, walnut, or cherry. These woods are durable and have a tight grain that helps resist knife scars. Consider the color contrast between different wood types. Combining light and dark woods can create a striking visual effect. But remember, the woods should have similar density to ensure even wear over time.Planning The Pattern
Decide on a pattern that suits your style and skill level. Simple checkerboard patterns are great for beginners. More complex designs, like herringbone or basket weave, add a unique touch but require precision. Sketch your pattern before you start cutting. This helps you visualize the final product and spot potential issues. Have you thought about how the pattern will look when the board is flipped?Measuring And Cutting
Accurate measurements are crucial to a seamless design. Double-check your measurements before making any cuts. A small mistake can throw off the entire pattern. Use a table saw for straight cuts and a miter saw for angled designs. Ensure your tools are sharp to prevent chipping or tearing the wood. Do you have a reliable ruler or square to guide your cuts?Arranging The Pieces
Lay out your cut pieces on a flat surface. This step helps you see how the colors and patterns come together. Adjust the pieces until you’re satisfied with the look. Consider how the board will be used. Arrange the pieces for both aesthetic appeal and functional strength. Are there any weak points where the board might split under pressure?Considering The Board’s Size
Think about the board’s intended use to determine its size. A larger board offers more cutting space but can be cumbersome to handle. Smaller boards are easier to store and clean. Make sure your design fits within your chosen dimensions. Are there any adjustments needed to maintain the pattern’s integrity?Cutting The Wood Pieces
Building an end grain cutting board involves precision and care. The first step is cutting the wood pieces. This process requires attention to detail. Properly cut pieces ensure a smooth final product. Understanding how to cut the wood pieces is crucial.
Select hardwoods like maple or walnut. They offer durability and beauty. Softwoods may not withstand knife cuts. Hardwoods provide a stable and lasting cutting surface.
Measuring And Marking
Accurate measurements lead to perfect cuts. Use a tape measure for precision. Mark each piece with a pencil. Clear marks prevent errors during cutting.
Setting Up The Tools
A table saw is ideal for cutting. Ensure the blade is sharp. A dull blade can tear wood fibers. Use safety gear like goggles and gloves. Safety should always be a priority.
Guide each wood piece through the saw. Keep hands a safe distance from the blade. Cut straight lines for uniform pieces. Consistency is key for a perfect fit.
Inspecting The Cuts
Examine each piece after cutting. Ensure there are no splinters or rough edges. Smooth edges fit better during assembly. Sand if necessary for a clean finish.
Arranging The End Grain Pattern
Arranging the end grain pattern is key in building a cutting board. Align wood pieces to create a checkerboard look. This pattern increases durability and adds a unique style.
Arranging the end grain pattern on your cutting board is an exciting stage in the building process. This step is where your creativity takes center stage, allowing you to craft a design that is both functional and visually stunning. With careful attention, you can transform a simple board into a masterpiece that enhances the look of your kitchen.Understanding The Basics Of End Grain Patterns
End grain patterns involve the orientation of wood fibers. When you cut across the grain, you expose the ends of the fibers, creating unique designs. These patterns not only add visual interest but also offer durability as they are gentle on knives.Choosing Your Wood Species
Selecting the right wood species is crucial for your cutting board’s appearance and functionality. Maple, walnut, and cherry are popular choices due to their hardness and attractive grain patterns. Each wood type offers a distinct color and texture, allowing you to personalize your board to match your kitchen style.Playing With Colors And Contrasts
Think about the visual impact of colors and contrasts. Mixing different wood types can create striking designs. Imagine alternating dark walnut with light maple for a bold checkerboard effect. The contrast can make your cutting board pop, transforming it into a centerpiece in your kitchen.Creating Symmetry Or Asymmetry
Consider whether you want a symmetrical or asymmetrical pattern. Symmetrical designs offer a balanced look, while asymmetrical ones can be more dynamic and artistic. Reflect on your personal taste—do you prefer harmony or a touch of chaos?Personal Experience: Finding Your Style
When I made my first cutting board, I opted for a classic checkerboard pattern. It was a safe choice but seeing it come together was thrilling. You might surprise yourself with what you can create. Have you ever thought about how a simple decision like pattern arrangement can influence your kitchen’s aesthetic?Experimenting With Layouts
Before gluing, experiment with different layouts. Lay out your wood pieces to visualize various patterns. You might discover a design that you hadn’t initially considered. This step is like a puzzle—each piece contributes to the bigger picture.Keeping Practicality In Mind
While aesthetics are important, consider practicality. Ensure your board is large enough for your chopping needs. The pattern should enhance functionality, not hinder it. Will your design hold up under frequent use? Arranging the end grain pattern is more than a design choice; it’s about crafting a piece that reflects your style and meets your culinary needs. Embrace this creative process, and you’ll end up with a cutting board that not only serves as a tool but also enriches your cooking experience.Gluing The First Layer
Gluing the first layer is crucial in building an end grain cutting board. Ensure edges are smooth and aligned for a seamless bond. Proper clamping guarantees a sturdy and durable foundation, essential for the board’s longevity.
Gluing the first layer of an end grain cutting board is a crucial step that sets the foundation for a durable and beautiful kitchen tool. This process can be both exciting and a little nerve-wracking, especially if it’s your first time. But don’t worry; with a few tips and tricks, you can achieve a seamless bond that will stand the test of time.Choosing The Right Glue
Selecting the right glue is fundamental. You want something strong and food-safe. Titebond III is a popular choice among woodworkers. It’s waterproof and FDA-approved for indirect food contact. Ensure your workspace is well-ventilated to avoid inhaling fumes.Preparing The Wood Pieces
Before gluing, make sure each wood piece is properly prepared. Sand the edges to remove any rough spots. This ensures a snug fit. You want the pieces to align perfectly, reducing gaps and increasing stability.Applying The Glue Evenly
Applying glue might seem straightforward, but technique is key. Use a brush or roller to spread the glue evenly across the wood surface. Avoid using your fingers as it could lead to uneven application. A thin, consistent layer is all you need.Clamping The Pieces Together
Clamps are your best friend during this stage. They ensure the wood pieces bond tightly. Space them evenly along the board, applying enough pressure to hold everything in place. Tip: Use a damp cloth to wipe away excess glue that seeps out during clamping.Allowing The Glue To Cure
Patience is vital here. Allow the glue to cure completely, usually about 24 hours. Rushing this step can compromise the board’s integrity. While waiting, think about how satisfying it will be to see your hard work come to life.Checking For Imperfections
After the glue has cured, inspect your work. Look for any gaps or misalignments. If you spot any, now is the time to address them. A bit of sanding can often fix small issues, ensuring a smooth and professional finish. Reflect: Have you ever rushed a step only to wish you hadn’t? Taking your time during the gluing process can make all the difference. You’ll appreciate the effort when you’re slicing veggies on a board that’s not just functional but a work of art.Sanding And Smoothing
Create a smooth finish on your end grain cutting board by sanding it thoroughly. Start with coarse sandpaper, then switch to finer grits for a polished surface. This step ensures the board is safe for food use and visually appealing.
Sanding and smoothing your end grain cutting board is a crucial step in the building process. It’s where your board transitions from a rough, raw piece of wood to a sleek and functional kitchen tool. This step not only enhances the board’s appearance but also ensures it’s safe and comfortable to use.Choosing The Right Sandpaper
Selecting the right sandpaper can significantly impact the outcome. Start with a coarse grit, around 80, to level the board and remove any uneven edges. Progress to finer grits like 120, then 220, to achieve a smooth finish. Have you ever tried sanding with the wrong grit and found it just doesn’t give the result you expected? It can be frustrating and time-consuming.Using The Proper Technique
Sanding isn’t just about rubbing paper on wood. Move the sandpaper in small circles or with the grain to avoid scratches. Apply even pressure to ensure a consistent surface. If you’ve ever rushed through sanding, you might have noticed rough spots later that could have been easily avoided.Safety First
Sanding can create a lot of dust. It’s essential to protect yourself with a mask and goggles. Keep your workspace clean to avoid inhaling wood particles. You wouldn’t want a simple DIY project to turn into a health hazard, right?Checking For Smoothness
After sanding, run your hand over the board’s surface. It should feel smooth without any splinters or rough patches. Adding a few drops of water can help highlight any uneven spots. If you find areas that still need work, don’t hesitate to sand them again.Final Touches
Once satisfied with the smoothness, wipe the board clean with a damp cloth. This removes any lingering dust and prepares the board for finishing. This step is crucial to ensure your board not only looks good but is also ready for its first use. Investing time in sanding and smoothing not only improves the board’s aesthetics but also its functionality. Have you considered how these meticulous steps add value to something you’ll use daily in your kitchen?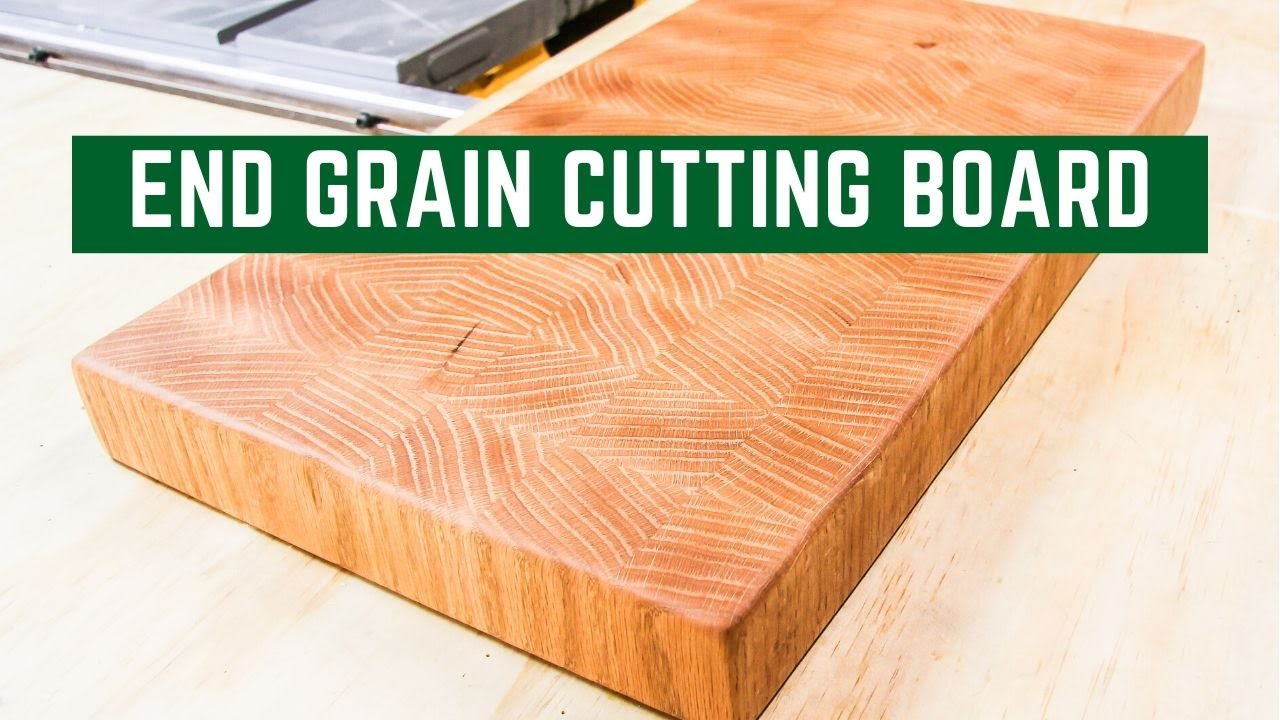
Credit: www.youtube.com
Trimming And Shaping
Trimming and shaping are vital for building an end grain cutting board. These steps ensure smooth edges and a professional look. Use precise cuts for a neat finish, enhancing durability and appearance.
When it comes to crafting a stunning end grain cutting board, trimming and shaping are where your board begins to take its final form. This stage requires precision and patience, as you transform rough edges into smooth, functional surfaces. It’s a crucial step that can make or break the aesthetics of your masterpiece. Let’s dive into the details of how you can ace this process, making sure your cutting board is not only functional but also a piece of art that you’d be proud to display.Understanding The Importance Of Trimming
Trimming is all about getting those edges just right. You want your board to look polished and well-finished. Consider the times when you’ve admired a sleek cutting board in a store. It’s often the clean lines and smooth surfaces that catch your eye, right? Start with a sharp saw and take your time. Rushing through trimming can lead to uneven edges, which can detract from the overall look and function of your board.Tools You Need For Perfect Edges
Having the right tools can make trimming a breeze. A table saw or a miter saw is your best friend here. They provide the precision needed for straight cuts. If you don’t have these tools at home, consider renting them from a local hardware store. Sometimes, investing in good equipment can save you from the frustration of uneven edges. It’s worth considering!Shaping For Functionality And Aesthetics
Shaping transforms your board from a simple slab into a functional kitchen tool. Rounded edges not only look appealing but also make handling safer and more comfortable. Use a router to achieve those smooth curves. Think about how you use a cutting board daily. Wouldn’t it be more pleasant if it had gentle, rounded edges that feel good to touch?Personal Experience: Learning From Mistakes
I once rushed through trimming and ended up with a board that was slightly uneven. It taught me the value of patience and the importance of checking your work as you go. Take your time with each cut, and don’t hesitate to sand down any rough spots. Remember, every mistake is a learning opportunity. Embrace it and improve your craft.Engaging The Reader: Your Turn
What challenges have you faced while trimming and shaping your projects? Share your stories in the comments below. Maybe you’ve discovered a unique technique or a favorite tool that makes the process easier. Engaging with fellow DIY enthusiasts can lead to valuable insights and tips that enhance your woodworking skills. By focusing on trimming and shaping, you ensure your cutting board not only serves its purpose but also adds beauty to your kitchen. Each step is a chance to refine your skills and create something truly unique.Applying Finish
Applying finish to an end grain cutting board enhances its durability and appearance. Begin by sanding the board smoothly. Then, apply food-safe mineral oil evenly, allowing the wood to absorb it. Finish with a protective wax layer for added shine and protection.
Applying a finish to your end grain cutting board is like giving your project the final touch it needs to shine. It’s not just about aesthetics; a good finish protects the wood from moisture, stains, and wear. You’ll want your cutting board to last for years, so let’s make sure it looks and performs its best.Choosing The Right Finish
Selecting the right finish is crucial. You want something food-safe, durable, and easy to apply. Mineral oil and beeswax are popular choices. They’re safe for food contact and enhance the wood’s natural beauty.Preparing The Surface
Before applying any finish, ensure the surface is smooth and dust-free. Sand the board with fine-grit sandpaper, such as 220 grit, to achieve a silky finish. Wipe it down with a damp cloth to remove any remaining dust particles.Applying Mineral Oil
Generously apply mineral oil using a clean, lint-free cloth. Let the oil soak into the wood fibers. This usually takes about 15 to 20 minutes. Reapply several coats until the board stops absorbing oil.Using Beeswax For Added Protection
Mix beeswax with mineral oil for a thicker, more protective layer. Warm the mixture slightly to make it easier to spread. Rub it into the board with a cloth, focusing on the edges and end grains where moisture can seep in.Buffing For A Smooth Finish
Once the board is fully coated and dry, buff it with a clean cloth. This brings out the shine and ensures a smooth surface. A well-buffed board not only looks attractive but also feels pleasant to the touch.Maintaining The Finish
Regular maintenance keeps your cutting board in top condition. Reapply mineral oil every month or so, depending on use. A quick oiling helps prevent cracks and keeps the board looking new. Isn’t it satisfying to see your board gleaming with a finish that you applied yourself? Taking these steps not only preserves the board but also adds a personal touch to your kitchen. Have you tried different finishes on your projects before? What worked best for you?Maintaining Your Cutting Board
Crafting an end grain cutting board involves arranging wood pieces so fibers face upwards. This design enhances durability, reducing knife marks. Regular maintenance includes gentle cleaning and applying food-safe mineral oil to preserve its surface and longevity.
Maintaining your end grain cutting board is essential for keeping it in top shape and ensuring it lasts for years. A well-maintained cutting board not only looks good but also provides a clean, safe surface for food preparation. Think of it as a small investment in your kitchen that deserves regular attention. Let’s dive into some practical tips and tricks to keep your cutting board looking fresh and performing well.Regular Cleaning
Cleaning your cutting board after each use is crucial. Use warm soapy water and a soft sponge to remove any food residue. Avoid soaking it in water to prevent warping or cracking. Rinse thoroughly and dry with a clean towel.Deep Cleaning
Sometimes, your cutting board needs a deeper clean. Sprinkle coarse salt over the surface and scrub with half a lemon. This natural method helps eliminate odors and bacteria. Rinse and dry thoroughly afterward.Seasonal Oiling
Your cutting board will benefit from regular oiling. Use food-grade mineral oil to hydrate the wood. Apply a generous amount and let it soak overnight. Wipe off excess oil the next day. This prevents drying and cracking.Stain Removal
Stains are inevitable but can be managed. Baking soda and water paste can lift stubborn marks. Rub gently and rinse off. This keeps your board looking pristine, ready for its next culinary adventure.Storage Tips
Store your cutting board in a dry place. Avoid direct sunlight to prevent fading. Consider a vertical stand to ensure proper air circulation. This helps maintain its shape and integrity.Handling Wear And Tear
Notice any scratches or dents? Light sanding can smooth them out. Use fine-grit sandpaper and follow the grain of the wood. This restores its surface, extending the lifespan of your cutting board. Are you ready to give your cutting board the care it deserves? Taking these steps not only enhances its longevity but also ensures a hygienic food preparation environment. How do you plan to incorporate these tips into your routine?Frequently Asked Questions
What Is The Best Thickness For An End Grain Cutting Board?
The ideal thickness for an end grain cutting board is between 1. 5 to 2 inches. This provides durability, stability, and prevents warping. Thicker boards absorb chopping impacts better and last longer, making them perfect for heavy use. Choose a board that matches your kitchen needs and personal preference.
What’s The Best Wood For An End Grain Cutting Board?
Maple, walnut, and cherry are ideal woods for end grain cutting boards. They offer durability and resistance to knife marks. These hardwoods are dense, minimizing bacteria growth and ensuring longevity. Their natural beauty and grain patterns enhance aesthetics. Choose kiln-dried wood for stability and consistent quality.
How To Make An End Grain Cutting Board?
Start by selecting hardwoods like maple or walnut. Cut wood into strips, then glue and clamp them. Once dried, cut across the grain to expose ends. Arrange pieces into your desired pattern, glue and clamp again. Sand the board smooth, then apply food-safe mineral oil for a lasting finish.
How Much Wood Is Needed For An End Grain Cutting Board?
An end grain cutting board typically requires 3 to 5 board feet of wood. Wood choice influences the final size. Popular options include maple, walnut, or cherry. Measure dimensions carefully to ensure enough wood for the desired design and thickness.
Conclusion
Creating an end grain cutting board is rewarding. You craft a durable piece. It’s beautiful and practical for any kitchen. Follow each step carefully. Use the right tools for precision. Enjoy the process. Your cutting board will last years with proper care.
Clean it regularly. Use food-safe oil to maintain its shine. Share your creation with friends. They’ll admire your handiwork. This DIY project adds value to your cooking space. Plus, it’s a great conversation starter. Your kitchen gains an artistic touch.
Crafting is fun and fulfilling. Embrace your creativity today.

Hi, I’m Daniel Brooks—a food lover and kitchen gear enthusiast. I enjoy testing cookware, utensils, and gadgets to see what really works in everyday cooking. At PlugChef.com, I share honest reviews, comparisons, and simple guides to help you choose the best tools for a safer, smarter, and more enjoyable kitchen.
Related posts:
 What Type of Cooking Utensils are Safe: Expert Picks
 What Innovations Could Blenders Make: Unleashing Future Tech
 Smart Strategies to Organize a Small Kitchen: Maximize Space
 How to Organize a Kitchen Cabinet: Expert Tips & Tricks
 How to Organize Kitchen Drawers: Expert Tips and Tricks
 How to Organize a Corner Kitchen Cupboard: Expert Tips

