Are you ready to discover a chocolate icing recipe that’s quick, easy, and absolutely delicious? Imagine spreading a glossy, rich chocolate topping on your cake in just seven minutes.
With this 7 Minute Boiled Chocolate Icing, you’ll learn how to create a smooth, creamy finish that will impress everyone. Whether you’re baking for a special occasion or just treating yourself, this recipe will become your new secret weapon. Keep reading, and you’ll master the perfect chocolate icing in no time!

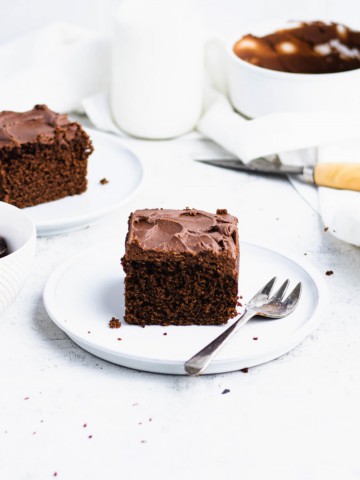
Credit: food52.com
Ingredients Needed
Creating the perfect 7 Minute Boiled Chocolate Icing requires a few simple ingredients. Each one plays a key role in the smooth texture and rich flavor. Using fresh, quality ingredients ensures the best results every time.
Gathering these ingredients before starting saves time and keeps the process smooth. Here is what you need to prepare this delicious icing.
Sugar
Sugar is the base of the icing. It provides sweetness and structure. Use granulated white sugar for the best texture.
Cocoa Powder
Cocoa powder gives the chocolate flavor. Choose unsweetened cocoa for a deep, rich taste. It blends smoothly with other ingredients.
Milk
Milk adds moisture and helps dissolve the sugar. Whole milk creates a creamier texture, but any milk type works.
Butter
Butter adds richness and smoothness. Use unsalted butter to control the salt level. It melts into the mixture for a glossy finish.
Vanilla Extract
Vanilla extract enhances the chocolate flavor. Just a small amount adds depth and aroma.
Credit: thesimple-sweetlife.com
Equipment Required
A saucepan and a mixing bowl are essential for making boiled chocolate icing. A wooden spoon helps stir the mixture smoothly. Measuring cups and spoons ensure accurate ingredient amounts.
To make the perfect 7-minute boiled chocolate icing, you need the right tools. Having the correct equipment ensures a smooth cooking process. It also helps achieve the best icing texture. Here’s what you’ll need.Mixing Bowl
A sturdy mixing bowl is essential. It holds all your ingredients together. Choose a heat-resistant bowl for safety.Whisk Or Hand Mixer
A whisk or hand mixer blends ingredients well. It creates a smooth and creamy icing. A hand mixer reduces mixing time.Saucepan
A medium-sized saucepan is perfect for boiling. It heats the mixture evenly. Ensure it has a heavy bottom to prevent burning.Measuring Cups And Spoons
Accurate measurements are crucial. Use measuring cups and spoons for precision. It keeps your recipe consistent each time.Spatula
A spatula helps scrape the bowl clean. It ensures no ingredients are wasted. Choose a flexible one for easy handling.Timer
Timing is key for this icing. Use a timer to track the 7 minutes. It prevents overcooking and ensures the right consistency.Cooling Rack
A cooling rack is ideal for setting the icing. It allows air to circulate. This helps the icing cool evenly.Step-by-step Preparation
Preparing 7 Minute Boiled Chocolate Icing is simple and rewarding. The key is to follow the steps carefully. This ensures the perfect texture and rich flavor. Each stage builds on the previous one for the best result.
Mixing Ingredients
Start by gathering all ingredients: sugar, cocoa, milk, butter, and vanilla. Use a clean bowl to mix the dry ingredients first. Combine sugar and cocoa powder well. Then add milk and melted butter to the mix. Stir gently until the mixture is smooth and free of lumps.
Boiling Process
Pour the mixture into a saucepan. Heat it over medium flame and bring it to a boil. Stir constantly with a wooden spoon to avoid burning. Keep boiling for about seven minutes. The mixture will thicken and become glossy. This step is crucial for that shiny, chewy icing texture.
Cooling And Setting
Remove the saucepan from heat. Let the icing cool slightly for a few minutes. Stir gently during cooling to keep it smooth. Pour the icing over your cake or cupcakes while still warm. It will set quickly and form a shiny, firm layer. Avoid touching it until fully set to keep the perfect finish.
Tips For Perfect Texture
Getting the texture of your 7 Minute Boiled Chocolate Icing just right can make all the difference between a good dessert and an unforgettable one. The secret lies in a few careful techniques that affect how smooth and shiny your icing turns out. Let’s dive into some practical tips that will help you achieve that perfect texture every time.
Avoiding Graininess
Graininess often happens when the sugar crystals don’t dissolve properly. To prevent this, make sure you stir the sugar and water mixture gently and continuously while heating. Using a clean, dry bowl for beating the mixture helps avoid any sugar crystals clumping together.
Also, don’t rush the beating process once the mixture reaches the right temperature. Beat it steadily until the icing holds soft peaks, which usually takes about 7 minutes. If you stop too soon, the sugar crystals won’t fully dissolve, leaving a grainy texture.
Achieving Glossy Finish
A glossy finish makes your chocolate icing look irresistible. One key is to add the butter and vanilla extract at the right time—once your mixture has cooled slightly but is still warm. This helps incorporate fat smoothly without breaking the texture.
Another tip is to avoid over-beating after adding the butter. Overdoing it can dull the shine and make the icing stiff. Have you noticed how even slight changes in timing can affect your icing’s appearance? Paying attention here can elevate your final look significantly.
Variations To Try
7 Minute Boiled Chocolate Icing is a classic that’s easy to tweak. Trying variations can transform this simple treat into something uniquely yours. Whether you want a subtle twist or a bold new flavor, small changes make a big difference.
Adding Flavors
You can brighten your icing by adding flavors right before it sets. A teaspoon of vanilla extract is the easiest upgrade and deepens the chocolate taste. If you want something different, try almond or peppermint extract for a fresh twist.
Spices like cinnamon or a pinch of cayenne add warmth and a surprising kick. Citrus zest, such as orange or lemon, can also lift the flavor and cut through the sweetness. Have you ever thought about mixing in a bit of coffee powder? It enhances the chocolate without overpowering it.
Using Different Chocolates
Switching the type of chocolate can completely change the character of your icing. Dark chocolate gives a richer, slightly bitter edge, great if you prefer less sweetness. Milk chocolate makes it creamier and smoother, perfect for those with a sweet tooth.
White chocolate is an adventurous choice that creates a lighter, sweeter icing. Mixing chocolates, like half dark and half milk, balances flavor and texture. What would happen if you tried flavored chocolates, such as chili or orange-infused? It’s worth experimenting to find your favorite blend.

Credit: food52.com
Serving Suggestions
Serving 7 Minute Boiled Chocolate Icing offers you a chance to elevate simple desserts into something truly special. This rich, glossy icing pairs beautifully with a variety of treats. How you serve it can change the whole eating experience, making your dessert memorable.
Classic Cakes And Cupcakes
This icing shines brightest on classic cakes and cupcakes. Spread it thick over a moist chocolate or vanilla cake to add a luscious, fudgy texture. You can also pipe it onto cupcakes for a smooth, shiny finish that looks as good as it tastes.
Have you tried chilling the iced cupcakes for a firmer bite? It creates a delightful contrast between the soft cake and the slightly hardened icing.
Fruit And Nut Pairings
Try serving the icing alongside fresh fruits like strawberries or bananas. The sweetness of the icing complements the tartness of berries perfectly. You can also sprinkle chopped nuts like walnuts or pecans on top to add a crunchy texture.
This combination brings a balance of flavors that keeps every bite interesting and satisfying.
Warm Desserts And Ice Cream
Drizzle the 7 Minute Boiled Chocolate Icing over warm desserts such as brownies or warm pound cake. The heat slightly softens the icing, creating a silky sauce that melts into the dessert. It also works wonders as a topping for vanilla or coffee ice cream.
Have you noticed how the warm and cold contrast awakens your taste buds? It’s a simple way to add excitement to your dessert plate.
Frequently Asked Questions
What Is 7 Minute Boiled Chocolate Icing?
7 minute boiled chocolate icing is a fluffy, smooth frosting made by boiling sugar syrup. It’s whipped with cocoa, butter, and egg whites. This icing is light, glossy, and perfect for cakes and cupcakes, offering a rich chocolate flavor and a melt-in-your-mouth texture.
How Do You Make 7 Minute Boiled Chocolate Icing?
To make it, boil sugar, water, and cocoa until soft ball stage (234°F). Beat egg whites until stiff. Slowly pour hot syrup into egg whites while beating. Add butter and vanilla, then whip until thick and fluffy. This process takes about seven minutes.
Can I Store 7 Minute Boiled Chocolate Icing?
Yes, you can store it. Keep the icing in an airtight container in the fridge for up to 3 days. Before use, let it come to room temperature and re-whip briefly to restore its fluffy texture.
Is 7 Minute Boiled Chocolate Icing Gluten-free?
Yes, this icing is naturally gluten-free. It contains no flour or gluten-containing ingredients. However, check the cocoa powder packaging for cross-contamination warnings if you have severe gluten sensitivity.
Conclusion
Boiled chocolate icing takes just seven minutes to make. It adds a smooth, rich taste to any cake. You only need a few simple ingredients. Stirring constantly helps the icing become glossy and thick. This easy recipe is perfect for beginners and busy cooks.
Give it a try to enjoy a delicious, homemade treat. Simple steps, great flavor. What’s not to love?

Hi, I’m Daniel Brooks—a food lover and kitchen gear enthusiast. I enjoy testing cookware, utensils, and gadgets to see what really works in everyday cooking. At PlugChef.com, I share honest reviews, comparisons, and simple guides to help you choose the best tools for a safer, smarter, and more enjoyable kitchen.
Related posts:
 What Type of Cooking Utensils are Safe: Expert Picks
 What Innovations Could Blenders Make: Unleashing Future Tech
 Smart Strategies to Organize a Small Kitchen: Maximize Space
 How to Organize a Kitchen Cabinet: Expert Tips & Tricks
 How to Organize Kitchen Drawers: Expert Tips and Tricks
 How to Organize a Corner Kitchen Cupboard: Expert Tips

