
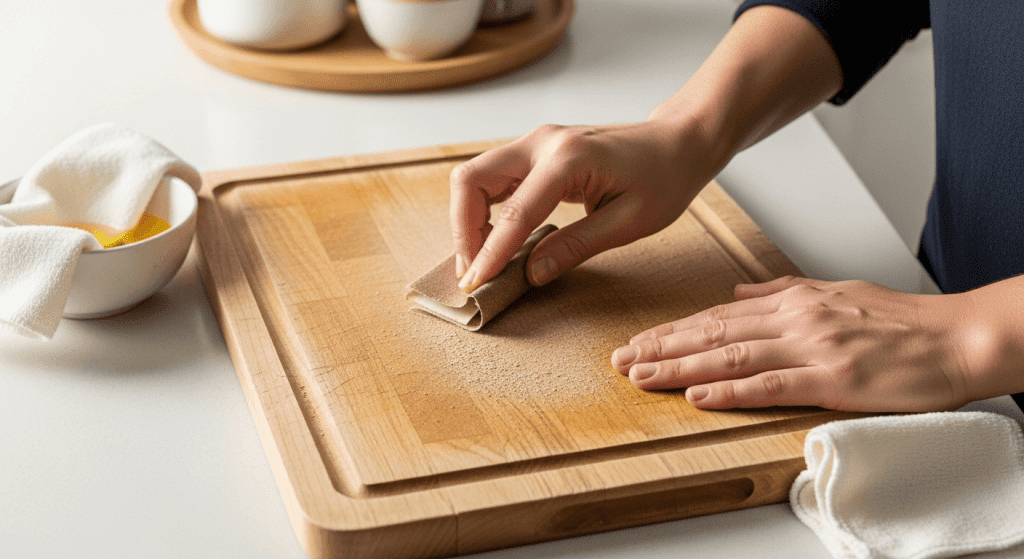
A well-loved wooden cutting board is one of the most used tools in any kitchen, but years of knife cuts, water stains, and heat exposure can leave it looking worn, rough, and even harboring harmful bacteria. Unlike cheap plastic boards that need to be replaced when damaged, solid hardwood, end-grain, and bamboo cutting boards can be fully restored to like-new condition with a simple refinishing process—no professional woodworking skills required. This guide walks you through the exact steps pros use to refinish cutting boards safely, using only food-safe materials, so you can extend your board’s life significantly, improve food safety, and save money on replacement costs.
 A properly refinished end-grain board has a smooth, non-porous surface that resists stains and bacteria
Image source: food52.com
A properly refinished end-grain board has a smooth, non-porous surface that resists stains and bacteria
Image source: food52.com
Why Refinish Your Cutting Board?
Many home cooks assume a worn cutting board is just an aesthetic problem, but deep knife grooves and porous, damaged wood create hidden pockets where E. coli, salmonella, and other harmful bacteria can hide, even after regular washing. Per USDA food safety guidelines for kitchen surfaces, damaged wooden cutting boards with deep grooves can harbor far more harmful bacteria than smooth, sealed surfaces, as regular cleaning cannot reach bacteria trapped in cracks.
Beyond safety, refinishing removes stubborn stains from coffee, wine, and acidic foods, fixes minor warping, and eliminates splinters that could contaminate food. For high-quality end-grain boards that cost $50 to $200, refinishing is also a cost-effective alternative to replacement, extending the board’s usable life significantly with proper maintenance. A common mistake is waiting until a board is severely damaged to refinish it; addressing wear early makes the process faster and prevents irreversible damage like deep cracking or warping.
What You’ll Need
Gather these supplies before starting to avoid interruptions and ensure you use only food-safe materials. Note that this process works for solid hardwood (maple, walnut, teak), end-grain, and bamboo cutting boards—do not attempt to refinish plastic boards, which should be replaced when damaged.
Tools
- Sanding block or random orbital sander (optional, for faster sanding on large boards)
- Tack cloth or lint-free microfiber rags
- Rubber gloves (to avoid getting oil on your hands)
- Soft-bristled brush (for stain pre-treatment)
- Drop cloth (to catch wood dust)
- Dust mask (fine wood dust is a respiratory irritant)
Supplies
- 80-grit sandpaper (for heavy scratches, gouges, and old finish removal)
- 120-grit sandpaper (for general surface smoothing)
- 220-grit sandpaper (for final silky finish)
- Food-grade USP mineral oil (the only oil approved for direct food contact; avoid non-food-grade mineral oil sold for machinery use)
- Optional: Food-safe beeswax cutting board conditioner (for extra water resistance)
- Mild dish soap, white vinegar, coarse salt, and fresh lemon (for pre-cleaning and stain removal)
What Not to Use
Never use vegetable oils (olive, canola, coconut), nut oils, varnish, polyurethane, or tung oil on cutting boards: these products are not food-safe, will go rancid over time, cause off-flavors in food, and can harbor bacteria. A common DIY mistake is using olive oil for a "natural" finish, but this will turn sticky and smelly within weeks of regular use.
Pre-Refinishing Prep
Proper prep ensures a smooth, even finish and prevents damage to your board during the process.
- Inspect the board for damage: Check for deep cracks that go all the way through the wood, widespread mold, or severe warping. Boards with deep cracks that could splinter should be replaced, as these areas cannot be fully sanitized even after refinishing. For minor mold, scrub the affected area with a 1:1 mix of white vinegar and water, let dry completely before proceeding.
- Set up your workspace: Work in a well-ventilated area (garage, outdoor patio, or room with open windows) and lay down a drop cloth to catch wood dust. Avoid sanding near food preparation areas to prevent dust from contaminating food.
- Remove old hardware: If your board has attached handles, metal brackets, or rubber feet, remove them before sanding to avoid damage.
Step-by-Step Refinishing Process
Step 1: Deep Clean the Board
Start by removing all surface grime, food residue, and old oil buildup to ensure sanding works effectively. Scrub the entire board with hot water and mild dish soap, using a soft-bristled brush to get into knife grooves. For light stains, make a paste of coarse salt and fresh lemon juice, scrub gently, and let sit for 10 minutes before rinsing. For tougher, set-in stains, spray undiluted white vinegar on the area, let sit for 5 minutes, then scrub and rinse.
Critical: Pat the board dry with a clean rag, then let it air dry completely for 2 to 3 hours in a low-humidity area. Sanding a damp board will cause it to warp and crack as it dries later. If you live in a humid climate, leave the board to dry overnight to be sure.
Step 2: Sand the Surface
This is the most important step for restoring a smooth, bacteria-resistant surface. Start with 80-grit sandpaper if your board has deep gouges, scratches, or old sealant; if it only has light wear, start with 120-grit to avoid removing excess wood.
- Always sand with the grain of the wood, not against it: sanding cross-grain creates tiny scratches that will be visible after oiling and trap dirt.
- Use a sanding block to apply even pressure, and sand the entire surface, including edges and ends, until all scratches, stains, and old oil residue are gone. For end-grain boards, sand the end grain a little longer to bring it flush with the edge grain, which prevents uneven wear over time.
- Once the surface is smooth, switch to 220-grit sandpaper for a final pass: this removes the tiny scratches left by coarser grits and leaves a silky-smooth finish.
Pro tip: For large boards, a random orbital sander will cut down on time, but use light pressure to avoid sanding through thin end-grain sections. Hand sanding gives you more control for small boards or curved edges.
After sanding, wipe the entire board with a tack cloth to remove all wood dust—any leftover dust will get trapped under the oil and create a gritty finish. Sanding with 80-grit paper will remove deep scratches and stubborn surface stains without damaging the wood.
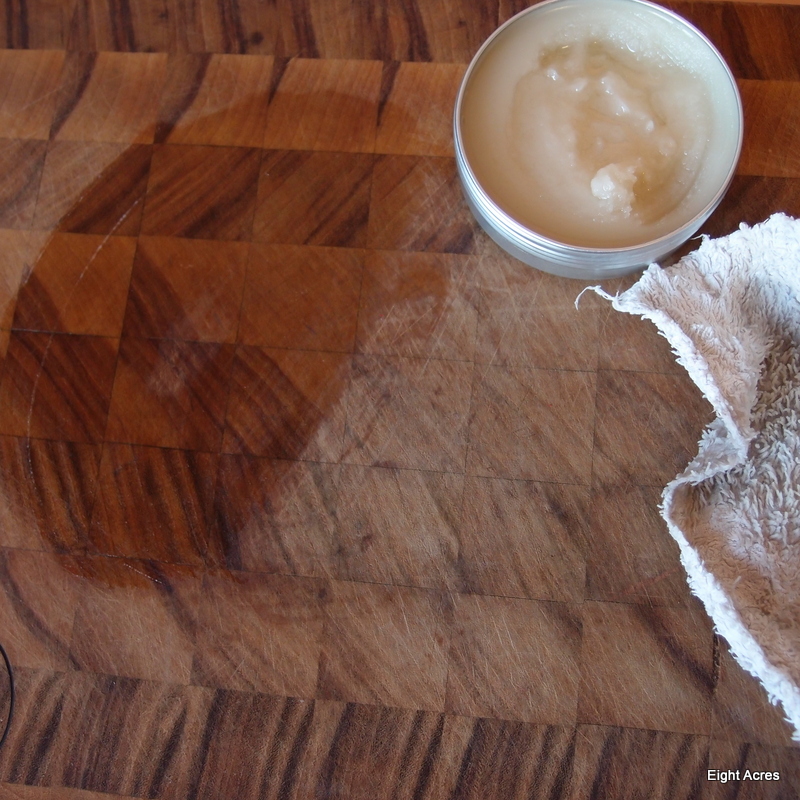 Sanding with the grain of the wood removes scratches without creating new cross-grain marks
Image source: eight-acres.com.au
Sanding with the grain of the wood removes scratches without creating new cross-grain marks
Image source: eight-acres.com.au
Step 3: Apply the Finishing Oil
Only use food-grade USP mineral oil for this step: it is inert, odorless, won’t go rancid, and is approved by the FDA for direct food contact. Avoid "mineral oil" sold at hardware stores for machinery use, as it contains additives that are toxic if ingested.
- Pour a generous amount of mineral oil directly onto the wood surface, or onto a lint-free rag.
- Rub the oil into the entire board, including edges, ends, and any cut-out handles, making sure no dry patches remain. For porous woods like bamboo or teak, use a paintbrush to work the oil into the grain for even coverage.
- Let the oil soak into the wood for 30 minutes (extend to 1 hour for very dry, porous boards).
- Wipe off all excess oil with a clean, dry rag. Any oil left on the surface will turn sticky and gummy over time, trapping bacteria and dirt. For step-by-step guidance on avoiding common oiling mistakes, see our guide to proper mineral oil application.
Optional pro step: For extra water and stain resistance, apply a second coat of oil after the first has soaked in, let sit for 30 more minutes, then wipe off excess. For an even more durable finish, apply a thin layer of food-safe beeswax conditioner over the oil, let sit for 1 hour, then buff off excess with a clean rag.
Step 4: Cure and Buff
Let the board cure for 24 hours in a well-ventilated area before using it for food. This allows the oil to fully penetrate the wood fibers, creating a hard, protective seal. After curing, the board will have a warm, natural sheen and a smooth, non-porous surface that resists stains and bacteria.
Pro tip: If you notice any rough spots after curing, lightly sand with 220-grit paper, wipe clean, and apply a thin additional coat of oil.
Troubleshooting Common Refinishing Issues
Even with careful work, you may run into these common issues—here’s how to fix them:
| Issue | Cause | Fix |
|---|---|---|
| Sticky, gummy surface after oiling | Excess oil left on the surface, or using non-food-grade oil | Sand the top layer with 220-grit sandpaper, wipe clean with tack cloth, and reapply food-grade mineral oil, wiping off all excess |
| Persistent stains after refinishing | Stains set deep into porous wood | Sand the affected area with 120-grit paper, then reapply oil; for very dark stains, apply a thin layer of beeswax conditioner to mask discoloration |
| Minor warping after refinishing | Board was not fully dry before oiling, or exposed to heat during curing | Place the board on a flat surface with a heavy cast iron skillet on top for 24 hours to press it flat |
| Deep gouges that won’t sand out | Damage too severe for sanding to repair | Fill the gouge with food-grade wood filler, sand smooth once dry, then reapply oil |
Long-Term Maintenance to Extend Your Board’s Life
Refinishing only takes a few hours, but proper daily care will help you go 12 to 18 months between refinishes, instead of every 6 months:
- Wash the board after each use with warm water and mild dish soap, never put it in the dishwasher or soak it in water, as excess moisture causes warping and cracking.
- Dry the board immediately after washing with a clean rag, then stand it upright to air dry completely on both sides.
- Apply a thin coat of food-grade mineral oil once a month, or whenever the board looks dry, faded, or feels rough to the touch. For optimal results, follow our guide to optimal oil application counts to avoid over-oiling.
- Use separate cutting boards for raw meat, produce, and cooked foods to reduce bacterial cross-contamination and minimize staining.
- Avoid exposing the board to direct heat (stovetops, ovens, hot pans) or prolonged sunlight, which causes warping and fading.
- For bamboo board maintenance, oil more frequently, as bamboo is more porous than hardwood, and follow bamboo board oiling best practices to avoid water damage. For dense hardwoods like teak, refer to long-term teak board care tips to prevent drying and cracking.
- Always follow safe wooden board cleaning protocols to avoid damaging the wood surface during daily use.
Frequently Asked Questions
How often should I refinish a wooden cutting board?
Refinish your board when you see deep, unrepaired gouges, widespread staining that won’t wash off, warping, or when the surface feels rough even after regular oiling. For average home use (3 to 5 uses per week), most boards need refinishing every 12 to 18 months. Heavy commercial use may require refinishing every 6 months.
What type of oil is best for cutting boards?
Food-grade USP mineral oil is the gold standard for cutting board refinishing: it is inert, odorless, won’t go rancid, and is approved by the FDA for direct food contact. For extra water resistance, you can top it with a thin layer of food-safe beeswax conditioner, but never use vegetable, nut, or finishing oils, as outlined in food-safe wood sealing guidelines.
Can I use vegetable oil to refinish my cutting board?
No. Vegetable and nut oils break down over time, turn rancid, cause off-flavors in food, and create a sticky surface that traps bacteria. Stick to food-grade mineral oil or FDA-approved beeswax blends only.
How do I remove tough stains before refinishing?
For organic stains from coffee, wine, or fruit, use the salt and lemon paste method outlined in the cleaning step above. For lighter discoloration, try a natural stain removal method before sanding. For ink or dye stains, lightly sand the affected area with 120-grit paper before proceeding with full refinishing. Avoid harsh bleach or chemical cleaners, which can discolor the wood and leave toxic residues.
Can I refinish a cracked cutting board?
Small surface cracks can be filled with food-grade wood filler, sanded smooth, and refinished. Deep cracks that go all the way through the board, or cracks near the edges that could splinter during use, mean the board should be replaced, as these areas cannot be fully sanitized even after refinishing.
How long does refinishing a cutting board take?
The active work (cleaning, sanding, oiling) takes 2 to 3 hours for a standard 12×18 inch board. Add 24 hours of curing time before you can use the board for food, so plan to start the process at least a day before you need the board.
Final Thoughts
Refinishing a wooden cutting board is a simple, low-cost DIY project that delivers huge returns for food safety, durability, and aesthetics. With just a few hours of work and basic supplies, you can restore a worn, damaged board to like-new condition, avoid the cost of replacement, and eliminate hidden bacteria that can cause foodborne illness. The biggest mistake DIYers make is cutting corners with non-food-safe oils or skipping the curing step—stick to the food-grade materials and steps outlined above, and your board will stay smooth and safe for years to come.
If you’re in the market for a high-quality board built to last through dozens of refinishes, check out our guide to custom wooden board construction to learn how to build your own, or explore our top picks for durable hardwood boards that hold up to heavy use.

I’m Abby Lu, a passionate home cook who loves simplifying everyday meals. At PlugChef.com, I share product reviews and cooking guides to help you find the best tools for your kitchen.
Related posts:
 How to Make a Fruit Basket for a Gift: Easy DIY Guide
 Do You Need a Basket? Essential Guide for Air Fryers
 How to Paint Kitchen Appliances: Transform Your Space
 All White Kitchen With White Appliances: Timeless Elegance
 How to Dispose of Small Household Appliances: Eco-Friendly Tips
Stainless Steel Or Black Kitchen Appliances: Perfect Choice?
How to Dispose of Small Household Appliances: Eco-Friendly Tips
Stainless Steel Or Black Kitchen Appliances: Perfect Choice?

