
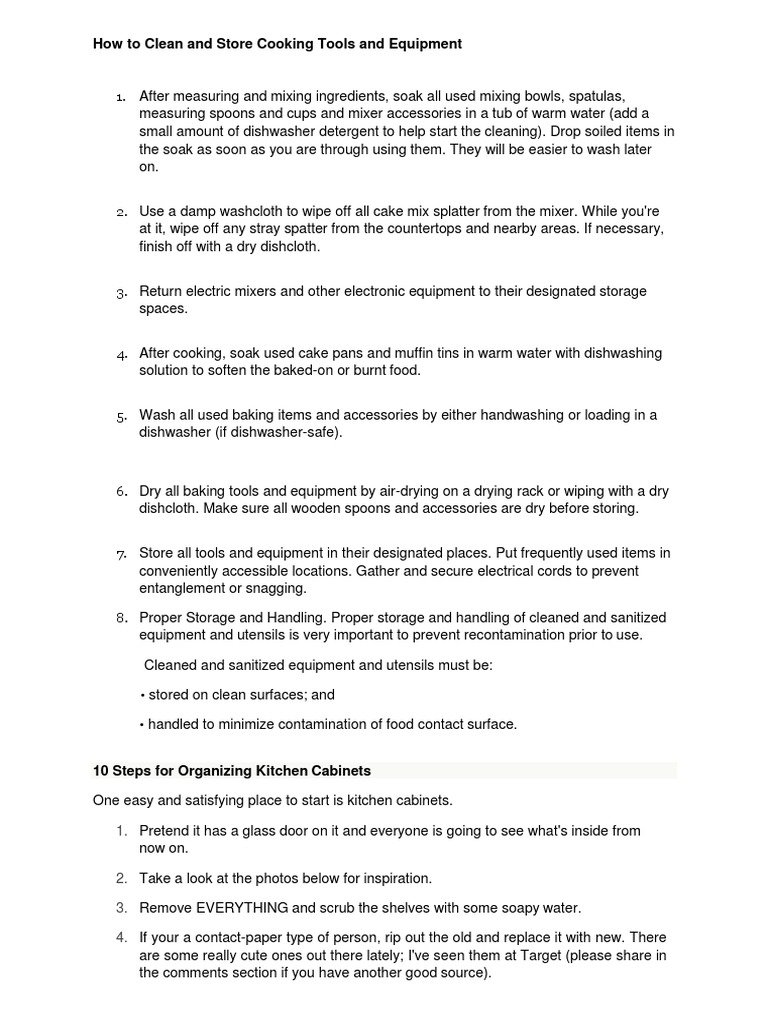
Dreading the post-baking cleanup is one of the most common barriers to regular home baking, but it doesn’t have to be. Improper cleaning and storage of baking tools doesn’t just lead to frustrating, time-consuming messes later – it can cause rust, warping, cross-contamination of flavors, and even shorten the lifespan of your favorite equipment by years. This updated guide draws on professional bakery maintenance standards and real-world home baker testing to walk you through step-by-step cleaning, drying, and storage protocols for every type of baking tool, plus long-term care tips to keep your arsenal in peak condition for every recipe, from simple chocolate chip cookies to delicate sourdough loaves.
Why Proper Cleaning and Storage Matters
Many home bakers only think about tool care when a mess becomes impossible to ignore, but consistent, proper maintenance delivers far more benefits than just a tidy kitchen. First, it protects food safety: leftover batter, raw egg residue, or crumbs left on tools can harbor bacteria like Salmonella and E. coli, which can transfer to future bakes if tools are not fully sanitized. Second, it saves you money: high-quality baking tools like stand mixers, heavy-duty baking sheets, and nonstick pans can cost $50 to $500 each, and neglect (like rust, coating degradation, or warping) can force you to replace them years before their expected lifespan. Finally, well-maintained tools perform better: a clean, sharp pastry cutter cuts through dough cleanly, a nonstick pan with an intact coating releases baked goods effortlessly, and a rust-free whisk beats ingredients evenly without leaving metal flecks in your batter.
Baking Tool Material Cheat Sheet
Different baking materials react to cleaning products, water, and storage conditions in unique ways, so tailoring your care routine to each tool’s composition is the first step to long-term longevity. Below is a quick overview of the most common baking tool materials and their core care needs, with detailed steps for each later in this guide.
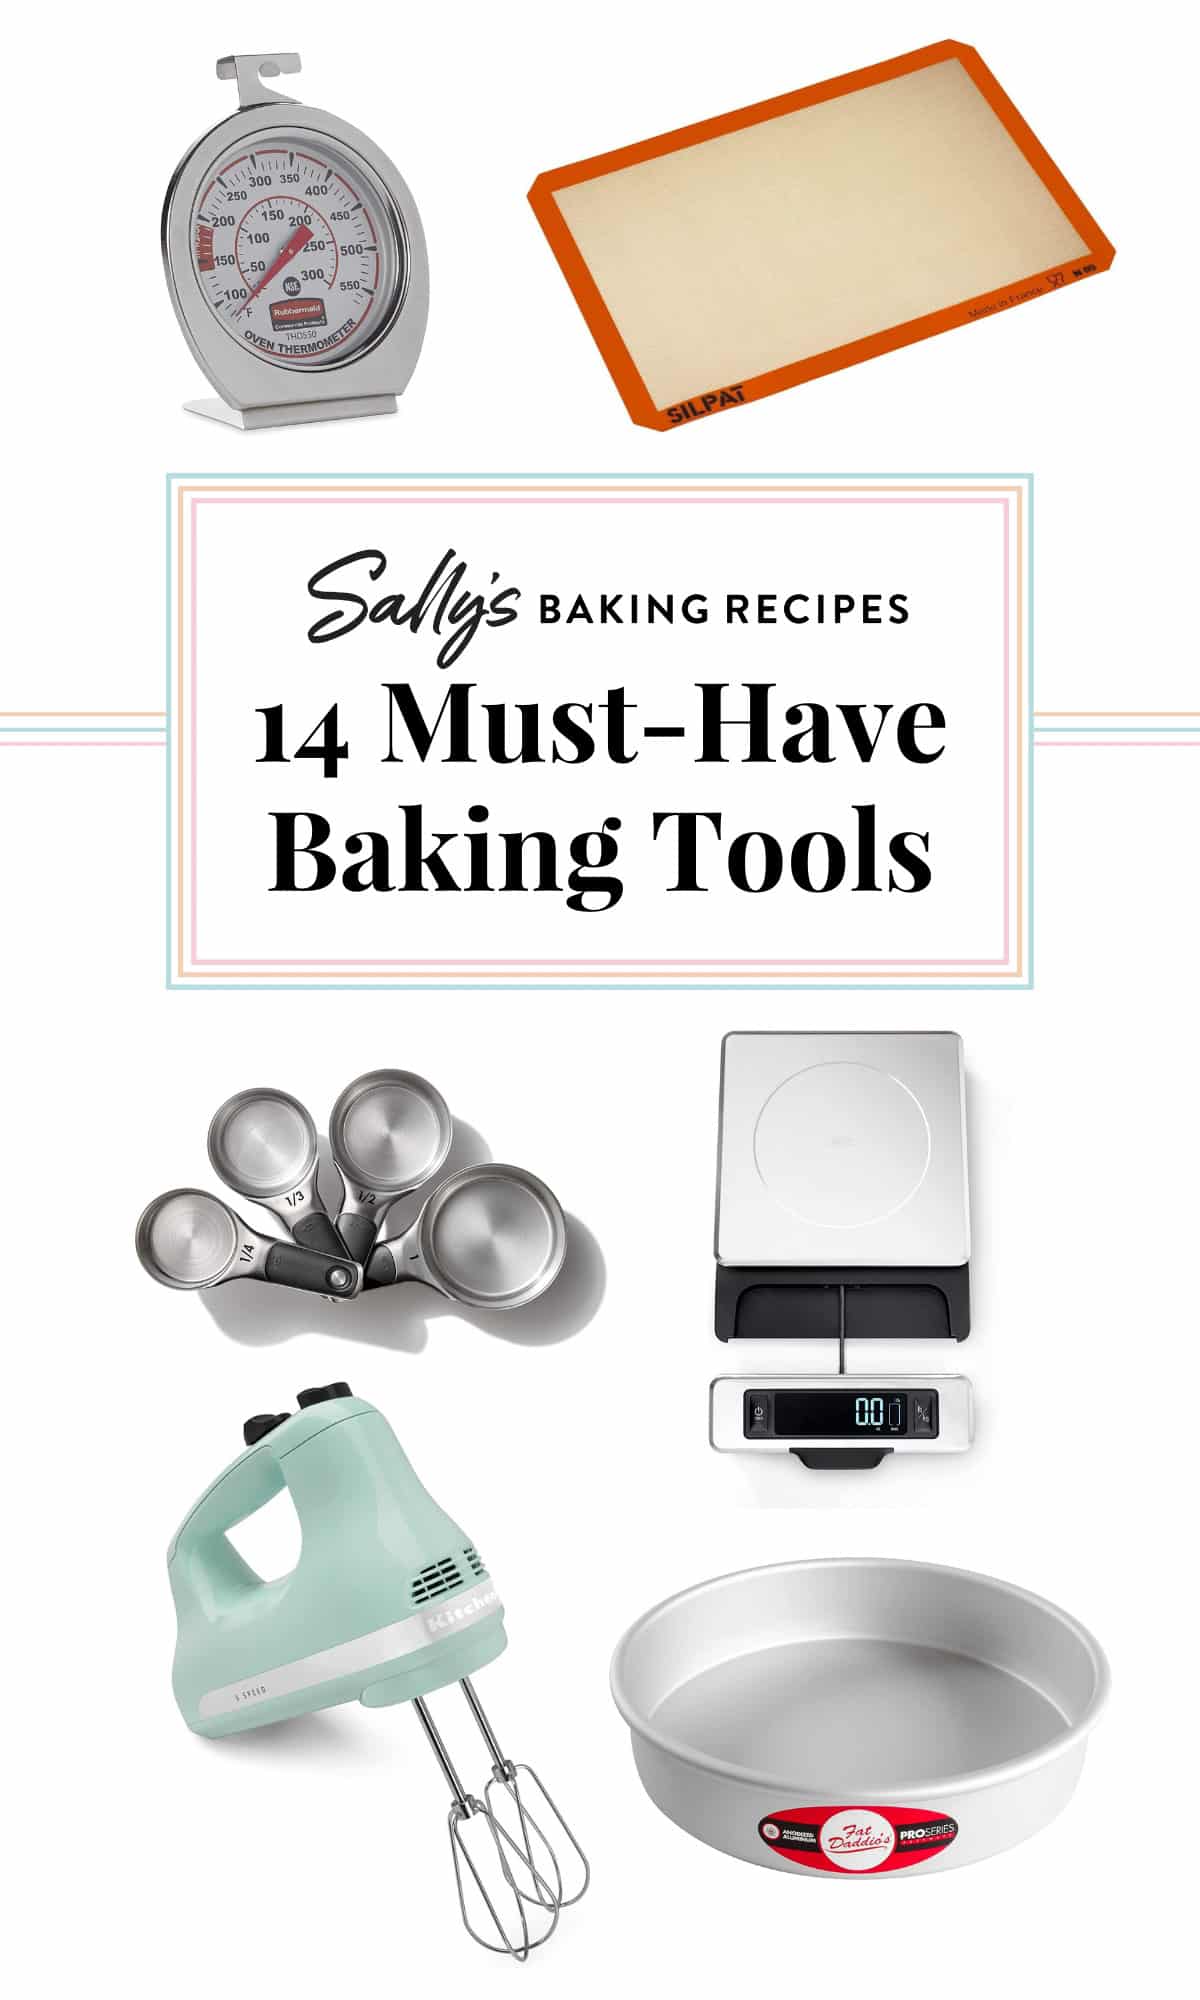 Common home baking tools, sorted by material for targeted cleaning and storage care.
Credit: sallysbakingaddiction.com
Common home baking tools, sorted by material for targeted cleaning and storage care.
Credit: sallysbakingaddiction.com
Nonstick Coated (baking sheets, cake pans, muffin tins)
Avoid abrasive scrubbers and high heat, which degrade the nonstick layer over time.
Stainless Steel / Uncoated Metal (whisks, mixing bowls, pastry cutters, cast iron bakeware)
Durable and rust-resistant when dried immediately, but prone to hard water stains and stuck-on sugar residue.
Silicone / Food-Grade Plastic (spatulas, pastry brushes, baking mats, measuring cups)
Heat-resistant and low-maintenance, but can absorb odors and degrade under high heat or harsh detergents.
Wood (spoons, rolling pins, cutting boards)
Naturally non-stick and gentle on bakeware, but prone to warping, cracking, and mold if exposed to excess moisture.
Glass / Ceramic (baking dishes, ramekins, measuring jugs)
The most low-maintenance baking material, but prone to water spots and chipping if stored improperly.
Step 1: Clean Baking Tools by Material
The biggest mistake home bakers make when cleaning tools is using a one-size-fits-all approach. Follow these material-specific steps to clean tools effectively without causing damage.
Nonstick Coated Tools
After each use, wipe out excess batter or crumbs with a soft paper towel, then wash with warm water and a few drops of mild dish soap using a soft sponge or non-abrasive scrubber. Avoid steel wool, scouring pads, or metal utensils, which can scratch and ruin the nonstick coating. For stuck-on residue, soak the pan in warm, soapy water for 10 minutes before scrubbing – never use high heat to loosen stuck food, as this can degrade the coating. Note that many newer nonstick coatings released after 2023 are labeled dishwasher safe, but older pans should always be hand washed to preserve their finish.
Stainless Steel and Uncoated Metal Tools
Wash with warm, soapy water and a non-abrasive sponge immediately after use. For stuck-on caramel, burnt sugar, or grease, make a paste of baking soda and water, apply it to the stain, let sit for 15 minutes, then scrub gently before rinsing. To remove hard water spots, wipe the surface with a cloth dipped in equal parts white vinegar and water, then rinse thoroughly. Dry immediately with a lint-free towel to prevent water marks and rust. For cast iron bakeware, avoid soap entirely – scrub with a stiff brush and hot water, then dry completely and coat with a thin layer of food-grade mineral oil to prevent rust. A common mistake is using steel wool on stainless steel tools, which creates tiny scratches that trap food residue and lead to rust over time – stick to non-abrasive sponges and baking soda paste instead.
Silicone and Food-Grade Plastic Tools
Most silicone and plastic utensils are dishwasher safe, but hand washing extends their lifespan by preventing degradation from high heat and harsh detergents. Wash with warm, soapy water, taking extra care to clean crevices in pastry brushes and the tines of whisks. To remove lingering odors from garlic, onions, or burnt food, soak the tool in a 1:1 mix of white vinegar and warm water for 30 minutes before washing. Avoid using sharp knives to cut or scrape silicone tools, as this can create tears that harbor bacteria.
Wooden Tools (spoons, rolling pins, cutting boards)
Never soak wooden tools, as prolonged water exposure causes warping, cracking, and mold growth. After each use, wipe with a damp cloth and mild soap, then towel dry immediately and let air dry fully before storing. Once a month, rub the wood with a thin coat of food-grade mineral oil to prevent drying and splitting. If a wooden tool develops deep cracks or a permanent odor, replace it – crevices can harbor harmful bacteria that are impossible to fully remove.
Glass and Ceramic Tools
These are the most low-maintenance baking materials: wash with warm, soapy water, or run through the dishwasher if the piece is labeled safe. For stuck-on baked goods, soak in warm, soapy water for 10 minutes before scrubbing. Dry with a towel to avoid water spots, especially if you have hard water.
Step 2: Safe, Effective Cleaning Solutions
You don’t need harsh, expensive chemicals to get baking tools sparkling clean – most messes can be tackled with non-toxic, food-safe ingredients you already have in your kitchen. For official food safety guidance on cleaning food-contact surfaces, refer to the USDA’s kitchen sanitation standards USDA food safety recommendations for kitchen equipment cleaning.
DIY Non-Toxic Cleaners
- All-purpose cleaner: Mix equal parts white vinegar and warm water in a spray bottle for cleaning glass, ceramic, and stainless steel surfaces.
- Stuck-on grime remover: Make a thick paste of baking soda and water, apply to stains, let sit for 15 minutes, then scrub gently with a soft sponge.
- Hard water stain remover: Rub lemon juice directly onto stainless steel or glass surfaces, let sit for 5 minutes, then rinse and dry for a streak-free shine.
- Wood conditioner: Mix 1 part food-grade mineral oil with 2 parts lemon juice to clean and condition wooden utensils in one step.
Commercial Cleaner Guidelines
If you prefer commercial products, always choose cleaners explicitly labeled safe for food-contact surfaces. Avoid bleach, oven cleaner, or abrasive all-purpose cleaners on nonstick coatings, silicone, and plastic tools, as these chemicals degrade the material and can leave harmful residues that transfer to food. For stainless steel tools, use a dedicated stainless steel cleaner to avoid scratching the surface, and always rinse thoroughly after use.
Step 3: Proper Drying to Prevent Damage
Drying is just as important as washing when it comes to tool care – trapped moisture is the number one cause of rust, mold, and warping in baking tools, even if you wash them perfectly every time.
Towel Drying vs. Air Drying Best Practices
Start by towel drying all tools immediately after washing with a lint-free microfiber cloth to remove excess water – avoid rough terry cloth towels, which can scratch nonstick coatings and leave lint on silicone and plastic surfaces. After towel drying, place tools on a clean dish rack with full air circulation, leaving space between each item so air can reach all sides. Never stack wet tools, as this traps moisture against the bottom layer and leads to mildew growth. For tools with wooden handles, pay extra attention to the joint between the wood and metal to ensure no water is trapped in the seam.
Eliminating Hidden Moisture
Even after air drying, small amounts of water can hide in hard-to-reach places like the tines of whisks, the crevices of pastry brushes, and the seams of mixing bowls. For extra peace of mind, especially in humid climates, leave tools to air dry for an extra 30 minutes before storing. If you live in an area with high year-round humidity, place a food-safe silica gel packet in your tool storage area to absorb excess moisture and prevent mold growth.
Step 4: Smart Storage for Longevity and Accessibility
How you store your baking tools is just as important as how you clean them – poor storage can cause scratches, warping, and rust even on perfectly maintained equipment, while smart storage makes your next baking session faster and more enjoyable.
Material-Specific Storage Rules
- Nonstick coated: Stack pans and sheets with parchment paper or silicone liners between each layer to prevent the coating from scratching. Avoid hanging heavy nonstick pans, as the weight can warp the coating over time.
- Wooden tools: Store in a cool, dry area away from direct heat sources (like next to your oven or stove) to prevent warping and cracking. Never stack heavy items on top of wooden spoons or rolling pins.
- Uncoated metal and cast iron: Store completely dry, and coat cast iron bakeware with a thin layer of food-grade mineral oil every few months to prevent rust.
- Silicone and plastic: Store flat or rolled, rather than folded, to avoid creating permanent creases or tears in the material.
Organization Hacks for Every Kitchen Size
For small apartments or kitchens with limited storage, use over-the-door organizer racks for small items like piping tips, cookie cutters, and measuring spoons to free up drawer space. For larger kitchens, install a pegboard wall to hang mixing bowls, whisks, and spatulas for easy, visible access. Drawer dividers are a low-cost, high-impact upgrade for keeping small utensils from tangling – label each divider if you have multiple bakers in your household to keep everyone on the same page.
 Organized storage of baking tools reduces post-baking cleanup time and prevents damage to equipment.
Credit: www.cleanipedia.com
Organized storage of baking tools reduces post-baking cleanup time and prevents damage to equipment.
Credit: www.cleanipedia.com
What to Avoid Storing Near
Keep baking tools away from harsh cleaning chemicals (like bleach or ammonia-based cleaners), which can leave residues that transfer to food. Avoid storing tools in direct sunlight, as UV rays degrade silicone and plastic materials over time, causing them to become brittle and break. Never store damp tools under the sink unless they are in a sealed, waterproof container, as the humidity will lead to mold and rust.
Long-Term Care: Extend Your Tool’s Lifespan by Years
Beyond daily cleaning and storage, a few simple long-term habits will keep your baking tools in like-new condition for decades, reducing waste and saving you money on replacements.
Seasonal Maintenance Checklist
Set a recurring reminder every 3 months to complete a full deep clean of all your baking tools: disassemble stand mixer attachments to remove stuck-on flour and batter, wipe down the interior of your oven to remove crumbs that can burn and affect the flavor of future bakes, and oil all wooden utensils with food-grade mineral oil to prevent drying. Every 6 months, inspect all tools for signs of wear: check nonstick pans for peeling coating, sharpen dull pastry knives and cookie cutters, and replace worn silicone spatulas that are cracked or sticky.
 Regular seasonal maintenance keeps high-quality baking tools in like-new condition for years of use.
Credit: www.cleanipedia.com
Regular seasonal maintenance keeps high-quality baking tools in like-new condition for years of use.
Credit: www.cleanipedia.com
Signs It’s Time to Replace a Tool
Even with perfect care, all baking tools have a finite lifespan. Replace any tool immediately if you notice:
- Rust spots on metal pans that can’t be removed with steel wool (rust can leach into food and cause foodborne illness)
- Peeling or flaking nonstick coating (small flakes can end up in your baked goods, and degraded coatings release harmful fumes when heated)
- Deep cracks in wooden utensils (these crevices harbor bacteria that can’t be fully sanitized)
- Permanent burnt or sour odors in silicone tools (this indicates the material has degraded and can transfer flavors to your bakes)
- Warped pans that don’t sit flat on your oven rack (this leads to uneven baking and burnt edges) In professional bakeries, tools are replaced on a set schedule even if they look intact, as worn surfaces lead to inconsistent bakes and increased food safety risk. You can adopt a similar habit by marking the purchase date on the bottom of high-use tools with a permanent marker to track their lifespan.
Frequently Asked Questions
Can I put all baking tools in the dishwasher?
No. While many stainless steel and explicitly labeled dishwasher-safe silicone tools can handle machine washing, uncoated cast iron, wooden utensils, nonstick pans with pre-2023 coatings, and tools with wooden or plastic handles should be hand washed to prevent warping, rust, or coating degradation. Always check the manufacturer’s care label first, as some newer nonstick coatings released after 2023 are designed to withstand repeated dishwasher cycles.
How do I remove stuck-on batter from small crevices like piping tips?
Soak the tools in warm, soapy water for 15 minutes, then use a small, soft-bristled toothbrush (dedicated to kitchen use only) to scrub away residue. For stubborn dried dough or royal icing, soak in a 1:1 mix of white vinegar and warm water for 30 minutes before scrubbing. Avoid using sharp objects like needles or toothpicks, which can scratch or bend delicate tips.
What’s the best way to store bulky items like baking sheets and stand mixers?
Store baking sheets vertically in a dedicated rack or deep drawer to save horizontal space and prevent scratching. For stand mixers, keep them on a countertop with a fitted cover to avoid dust and flour buildup in the motor, or store in a low cabinet if you have limited counter space, making sure the attachment port is covered to prevent crumbs from clogging the mechanism.
How often should I deep clean my baking tools?
Wipe down tools with a damp cloth after every use to remove excess food residue, and complete a full deep clean every 1 to 2 months (or more frequently if you bake more than once a week). For tools that come into contact with raw eggs, meat, or dairy, sanitize with a food-safe disinfectant after each use to prevent cross-contamination. Always follow the manufacturer’s specific cleaning guidelines for high-value tools like stand mixers and cast iron bakeware.
Final Tips for Stress-Free Baking Tool Care
Proper cleaning and storage of baking tools doesn’t have to be a time-consuming chore – a consistent 5-minute post-baking routine of washing, drying, and putting tools away will save you hours of scrubbing stuck-on messes later, and keep your equipment in perfect condition for years of use. For a visual walkthrough of our expert cleaning and storage routine, check out this step-by-step video guide here. Ready to put your freshly cleaned tools to work? Browse our collection of tested, beginner-friendly baking recipes to try out your equipment today.

I’m Abby Lu, a passionate home cook who loves simplifying everyday meals. At PlugChef.com, I share product reviews and cooking guides to help you find the best tools for your kitchen.
Related posts:
 How Do You Pronounce Colander: Clear Guide & Tips
 Is Nylon Or Silicone Better for Cooking Utensils: Ultimate Guide
 How to Cut Skirt Board for Stair: Expert Tips & Techniques
 Vintage First Aid Kit Metal Box: Timeless Safety and Style
 First Aid Kit for Restaurant: Essential Safety Gear You Need Today
 First Aid Kit for Sports: Essential Items for Quick Injury Care

