
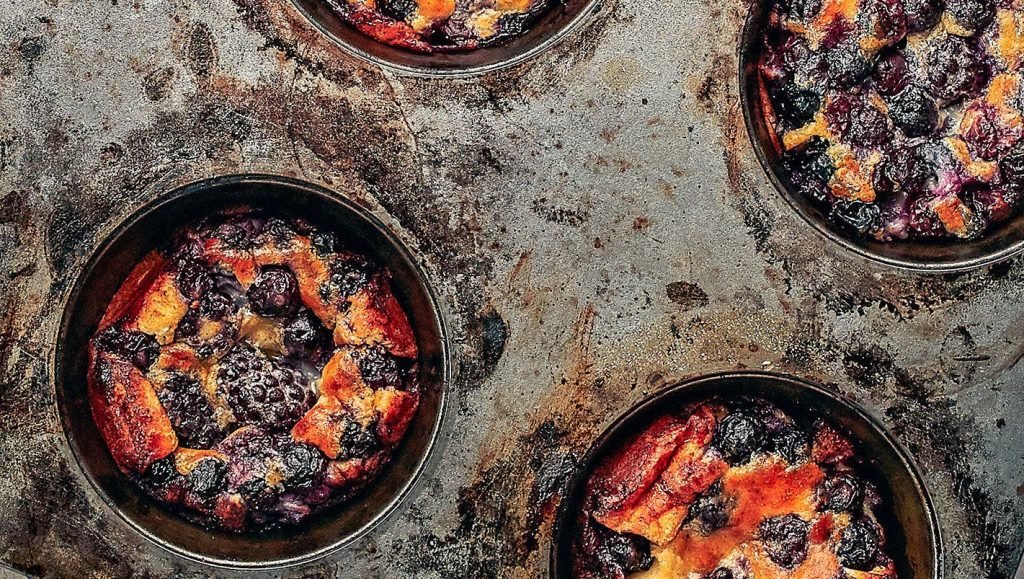
Imagine waking up to warm, fluffy Dutch babies that are perfectly portioned and baked right in a muffin tin. If you love easy breakfast ideas that impress without stress, this recipe is made just for you.
You’ll discover how simple it is to create these golden, crispy-edged delights that everyone will crave. Ready to transform your mornings with a fun twist on a classic? Keep reading and get ready to master Dutch babies in muffin tins!

Credit: www.thebakedept.com
Why Choose Muffin Tin Dutch Babies
Choosing muffin tin Dutch babies offers a simple twist on a classic recipe. This method makes Dutch babies easy to share and enjoy. Each mini Dutch baby comes out perfectly cooked and ready to serve. The muffin tin format suits many occasions and adds variety to your breakfast or brunch table.
Benefits Of Individual Portions
Each Dutch baby fits into a muffin cup, creating a small, neat portion. This helps control serving size and reduces food waste. Everyone gets their own mini pancake, avoiding the need to cut or divide. It also keeps the presentation tidy and appealing.
Quick And Easy Serving
Mini Dutch babies bake faster than one large one. This shortens cooking time and keeps the kitchen running smoothly. They come out ready to eat, no slicing or plating needed. Perfect for busy mornings or casual brunches.
Perfect For Gatherings
Mini Dutch babies make sharing easier at parties or family meals. Guests can grab a portion without waiting or fuss. They suit all ages and preferences, with room for different toppings. The muffin tin style adds charm and fun to any table.
Key Ingredients For Fluffy Dutch Babies
Fluffy Dutch babies baked in a muffin tin need the right ingredients to rise perfectly. The batter should be smooth and light to create that delicate puff. Freshness and balance in flavors make each bite enjoyable. Small tweaks can change the texture and taste significantly.
Essential Batter Components
- Eggs:Provide structure and lift for the Dutch baby.
- Flour:Use all-purpose flour for a tender crumb.
- Milk:Adds moisture and helps thin the batter.
- Sugar:A small amount for subtle sweetness.
- Butter:Melted and hot, it creates a crispy edge.
- Vanilla Extract:Enhances flavor without overpowering.
- Salt:Balances sweetness and boosts flavor.
Tips For Freshness And Flavor
- Use room temperature eggs and milk for better mixing.
- Whisk batter well to avoid lumps and ensure smoothness.
- Preheat muffin tin with butter to get crispy edges.
- Serve immediately after baking to enjoy maximum puffiness.
- Dust with powdered sugar or fresh fruit for added zest.
Optional Add-ins And Variations
- Blueberries or raspberries for a fruity burst.
- Cinnamon or nutmeg for warm spice notes.
- Chocolate chips for a sweet surprise.
- Lemon zest to brighten flavors.
- Almond extract for a nutty twist.
Step-by-step Baking Process
Preheat the oven and grease the muffin tin well. Pour the batter into each cup and bake until puffed and golden. Serve warm with your favorite toppings.
The ‘Step-by-Step Baking Process’ for Dutch Babies in a Muffin Tin is simple. With a few key steps, you can create these delicious mini pancakes. Follow along to achieve that perfect rise and fluffy texture.Preparing The Muffin Tin
Start by preheating your oven to 425°F. Use a non-stick muffin tin. Grease each cup well with butter or oil. Ensure every corner is covered. This prevents sticking and helps with browning. A properly greased tin is crucial for easy removal.Mixing The Batter Correctly
Gather your ingredients: eggs, milk, flour, and a pinch of salt. Beat eggs until they are light and frothy. Gradually add milk and continue mixing. Slowly incorporate flour, avoiding lumps. Consistency should be smooth and slightly runny. Let the batter rest for 5 minutes to settle.Baking Tips For Perfect Rise
Pour batter into the prepared muffin tin, filling each cup halfway. Place the tin in the preheated oven. Bake for 15-20 minutes until golden and puffy. Avoid opening the oven during baking. This ensures the Dutch Babies rise beautifully. Serve immediately for best texture.Serving Ideas And Toppings
Dutch Babies baked in a muffin tin are a fun twist on the classic dish. Their smaller size makes them perfect for trying different toppings and flavors. Serving them with a variety of toppings lets you tailor each bite to your mood, whether you want something sweet, savory, or paired with the right drink.
Sweet Toppings To Try
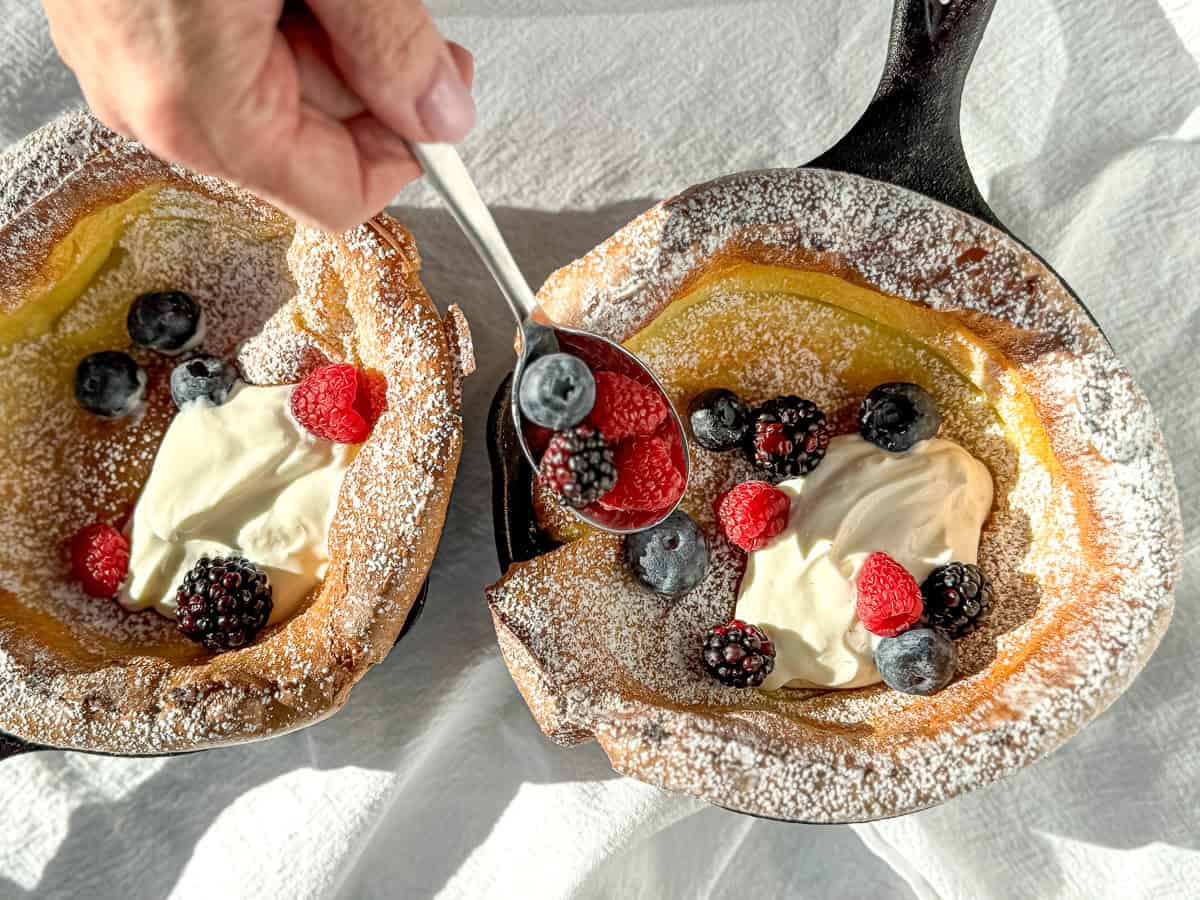
Sweet toppings add a delicious contrast to the light, fluffy texture of Dutch Babies. You can keep it simple with a dusting of powdered sugar and a squeeze of fresh lemon juice. Adding fresh berries like blueberries or raspberries brings a burst of color and natural sweetness.
For something richer, try spreading a bit of Nutella or peanut butter before baking. Maple syrup or honey drizzled over the top gives a classic finish that’s hard to resist. Have you ever experimented with flavored whipped cream or a sprinkle of cinnamon sugar? These small touches can turn your Dutch Babies into a dessert or a sweet breakfast treat.
Savory Options For Variety
Don’t overlook savory toppings—they bring a whole new level of flavor to Dutch Babies in muffin tins. A dollop of sour cream combined with smoked salmon and fresh dill makes an elegant snack. You can also try sautéed mushrooms and caramelized onions for an earthy, satisfying bite.
Cheese lovers might enjoy grated cheddar or feta melted right on top. Adding herbs like chives or parsley brightens the flavors and adds freshness. Why not mix a bit of cooked bacon or ham for a hearty, protein-packed option? Savory toppings are a great way to make Dutch Babies suitable for lunch or dinner.
Pairing With Beverages
Choosing the right beverage can elevate your Dutch Baby experience. For sweet versions, a cup of freshly brewed coffee or a fruity herbal tea complements the flavors beautifully. You might enjoy a glass of sparkling water with a twist of lemon to keep things light and refreshing.
Savory Dutch Babies pair well with savory drinks like tomato juice or a classic Bloody Mary. If you prefer something non-alcoholic, try a chilled glass of iced green tea or a citrusy lemonade. Have you ever considered a light white wine or mimosa for a brunch gathering? The right drink enhances every bite and adds a festive touch.
Troubleshooting Common Issues
Troubleshooting common issues with Dutch Babies in muffin tins helps create perfect mini pancakes every time. Small mistakes can affect the texture and rise of these treats. Quick fixes and tips improve the baking process and the final result.
Preventing Flat Dutch Babies
Flat Dutch Babies often mean the oven was not hot enough. Preheat the oven to a high temperature before baking. Use a hot muffin tin to help the batter rise quickly. Avoid opening the oven door during baking as heat escapes easily.
Use fresh baking powder if the recipe calls for it. This ingredient helps the Dutch Baby puff up. Make sure the batter is well mixed but not overmixed. Overmixing can cause the batter to lose air and flatten.
Avoiding Overcooking
Overcooked Dutch Babies become dry and tough. Set a timer and check the muffins a few minutes before the end. Remove them as soon as the edges are golden brown and the centers look set. Avoid keeping the muffins in the hot pan after baking to stop extra cooking.
Use an oven thermometer to confirm the right temperature. Sometimes oven dials can be inaccurate. If the muffins cook too fast, lower the temperature slightly next time.
Fixing Batter Consistency
Thick batter leads to dense muffins, while runny batter spreads too much. The right batter should pour easily but still hold some shape. Add a little milk if the batter is too thick. Add a small amount of flour if it is too runny.
Mix ingredients gently to avoid lumps but keep some air in the batter. Let the batter rest for a few minutes before pouring into the muffin tin. This helps the flour absorb liquid and improves texture.

Credit: butfirstwebrunch.com
Storage And Reheating Tips
Storing and reheating Dutch Babies made in muffin tins can be simple and effective if you use the right techniques. These delicate treats can lose their charm quickly if not handled properly, but a little care helps you enjoy them fresh, even after a day or two. Let’s look at how to keep your Dutch Babies tasting just as good as when they came out of the oven.
Keeping Dutch Babies Fresh
Once your Dutch Babies have cooled down, store them in an airtight container to maintain their softness. Avoid stacking them directly on top of each other; placing parchment paper between layers works well.
Keep the container in the refrigerator if you plan to eat them within 1–2 days. If you leave them out at room temperature, aim to consume them within a few hours to avoid sogginess or spoilage.
Best Reheating Methods
Reheating Dutch Babies in muffin tins is best done in an oven or toaster oven to preserve their crisp edges. Preheat your oven to 350°F (175°C), place the Dutch Babies on a baking sheet, and warm for about 5–7 minutes.
Microwaving can make them soggy, so it’s best avoided unless you’re in a hurry. If you do use a microwave, heat in short bursts and check frequently to prevent over-softening.
Freezing For Later Use
To freeze, wrap each Dutch Baby muffin tightly in plastic wrap, then place them in a freezer-safe bag. This helps protect against freezer burn and keeps flavors intact.
When ready to eat, thaw them in the refrigerator overnight. Reheat in the oven as described above to regain their original texture and taste.
Have you tried freezing your Dutch Babies before? You might be surprised how well they keep their flavor and texture with just a bit of planning.
Credit: butfirstwebrunch.com
Frequently Asked Questions
What Are Dutch Babies In A Muffin Tin?
Dutch Babies in a muffin tin are mini pancake-like treats baked individually. They puff up with crispy edges and soft centers, making perfect single servings. Using a muffin tin ensures even cooking and easy portioning for breakfast or brunch.
How Do You Make Dutch Babies In Muffin Tins?
To make Dutch Babies in muffin tins, whisk eggs, flour, milk, and sugar. Pour batter into preheated, greased muffin cups and bake at high heat. They puff up and turn golden brown in about 15-20 minutes.
Can You Customize Dutch Babies With Toppings?
Yes, Dutch Babies can be topped with fresh fruits, powdered sugar, syrup, or yogurt. Savory toppings like cheese and herbs also work well. This versatility makes them great for sweet or savory meals.
Are Muffin Tin Dutch Babies Healthier?
Muffin tin Dutch Babies allow better portion control, which can help with calorie management. Baking individual servings also reduces the need for excess oil or butter. They can be made with whole grain flour for added nutrition.
Conclusion
Dutch babies in muffin tins make breakfast fun and easy. Each mini pancake cooks quickly and looks inviting. You can add fruits, syrup, or powdered sugar on top. This recipe suits busy mornings and small gatherings. Try it once, and you will want to make it again.
Simple, tasty, and perfect for sharing with family or friends. Give this idea a chance to brighten your breakfast table. Enjoy the warm, fluffy treats fresh from the oven.

Hi, I’m Daniel Brooks—a food lover and kitchen gear enthusiast. I enjoy testing cookware, utensils, and gadgets to see what really works in everyday cooking. At PlugChef.com, I share honest reviews, comparisons, and simple guides to help you choose the best tools for a safer, smarter, and more enjoyable kitchen.
Related posts:
 What Type of Cooking Utensils are Safe: Expert Picks
 What Innovations Could Blenders Make: Unleashing Future Tech
 Smart Strategies to Organize a Small Kitchen: Maximize Space
 How to Organize a Kitchen Cabinet: Expert Tips & Tricks
 How to Organize Kitchen Drawers: Expert Tips and Tricks
 How to Organize a Corner Kitchen Cupboard: Expert Tips

