
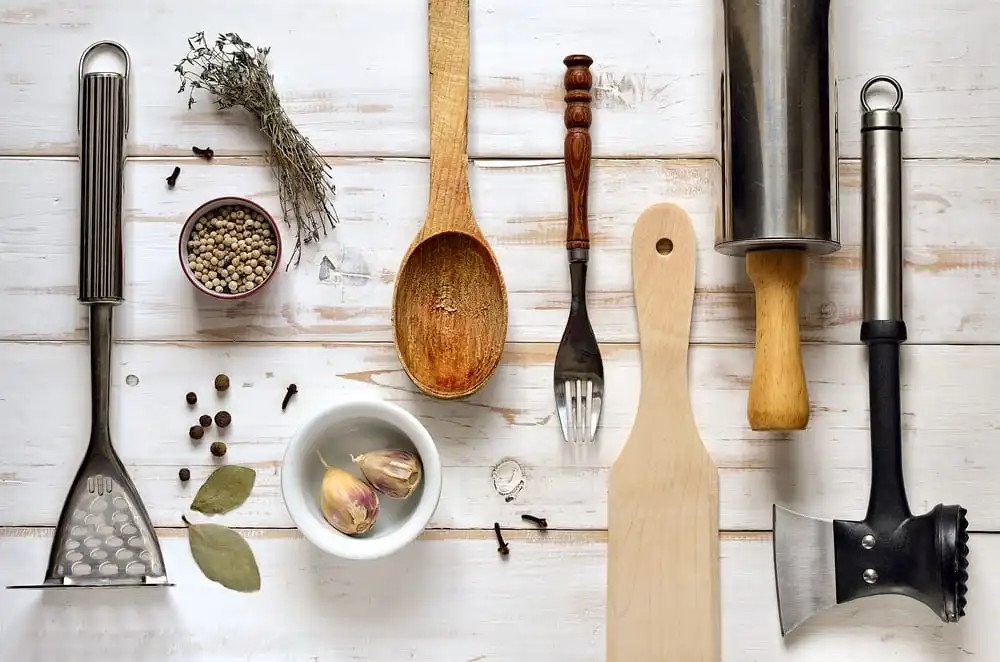
Baking combines precision and creativity, but even the most carefully followed recipe can fall flat if your tools are neglected. Sticky residue on a rolling pin, warped silicone baking mats, or rust spots on metal measuring cups don’t just make cleanup a chore—they can alter bake times, introduce off-flavors, and even pose food safety risks from trapped bacteria. Proper maintenance and cleaning extend the lifespan of your gear by 2–3x on average, per University of Minnesota Extension’s kitchen equipment care guidelines, and ensure every batch turns out as intended. This guide breaks down material-specific care routines, daily maintenance habits, stain removal tricks, and storage best practices to keep your baking tools in peak condition, no matter if you’re a casual home baker or run a small cottage food operation.
Core Baking Tools & Their Unique Care Needs
Not all baking tools are built the same, and their care routines vary drastically based on material. Using the wrong cleaner or storage method for your gear can cause warping, rust, or coating degradation in as little as a few uses. Below are care guidelines for the most common baking tool materials:
Metal Tools (Stainless Steel, Aluminum, Carbon Steel)
Metal tools including whisks, measuring cups, baking sheets, and metal spatulas are kitchen staples, but their porosity and corrosion resistance vary by alloy. Stainless steel is the most low-maintenance option, resisting rust and pitting when cared for properly, while aluminum is lightweight but can dent easily. Carbon steel baking sheets, favored by professional bakers for their even heat distribution, are highly prone to rust if exposed to moisture for extended periods. For all metal tools, avoid abrasive scouring pads and chlorine-based cleaners, which can etch surfaces and create micro-scratches that harbor bacteria.
Non-Stick Bakeware & Mats
Non-stick pans, silicone baking mats, and coated cookie sheets eliminate the need for excess butter or oil, but their performance depends entirely on the integrity of their coating. Scratches from metal utensils, harsh abrasive cleaners, or exposure to extreme heat (above 450°F/232°C for most standard non-stick) will degrade the coating over time, leading to stuck-on food and potential release of harmful fumes if overheated. Most modern non-stick bakeware is also not designed to withstand the high heat and harsh detergents of dishwashers.
Silicone & Food-Grade Plastic Tools
Food-grade silicone tools (spatulas, pastry brushes, muffin cups) and BPA-free plastic measuring cups are durable and heat-resistant, but they can absorb strong odors and stains from spices, tomato-based batters, or burnt sugar if not cleaned promptly. Low-quality plastic tools may also warp in the dishwasher’s high heat, so always check the manufacturer’s care label before cleaning.
Wooden Tools (Spoons, Rolling Pins, Bowls)
Wooden baking tools are prized for their gentle touch on non-stick surfaces and rustic aesthetic, but their porous nature makes them susceptible to cracking, warping, and bacterial growth if neglected. The #1 mistake home bakers make with wooden tools is soaking them in water for extended periods, which causes the wood to swell and split as it dries.
Glass & Ceramic Bakeware
Glass (like Pyrex) and ceramic bakeware are non-porous and resistant to stains and odors, but they are prone to thermal shock: sudden temperature changes (like moving a hot dish straight to the counter or rinsing with cold water) can cause them to crack or shatter. Always let glass and ceramic bakeware cool to room temperature before cleaning, and avoid using metal utensils that can scratch glazed ceramic surfaces.
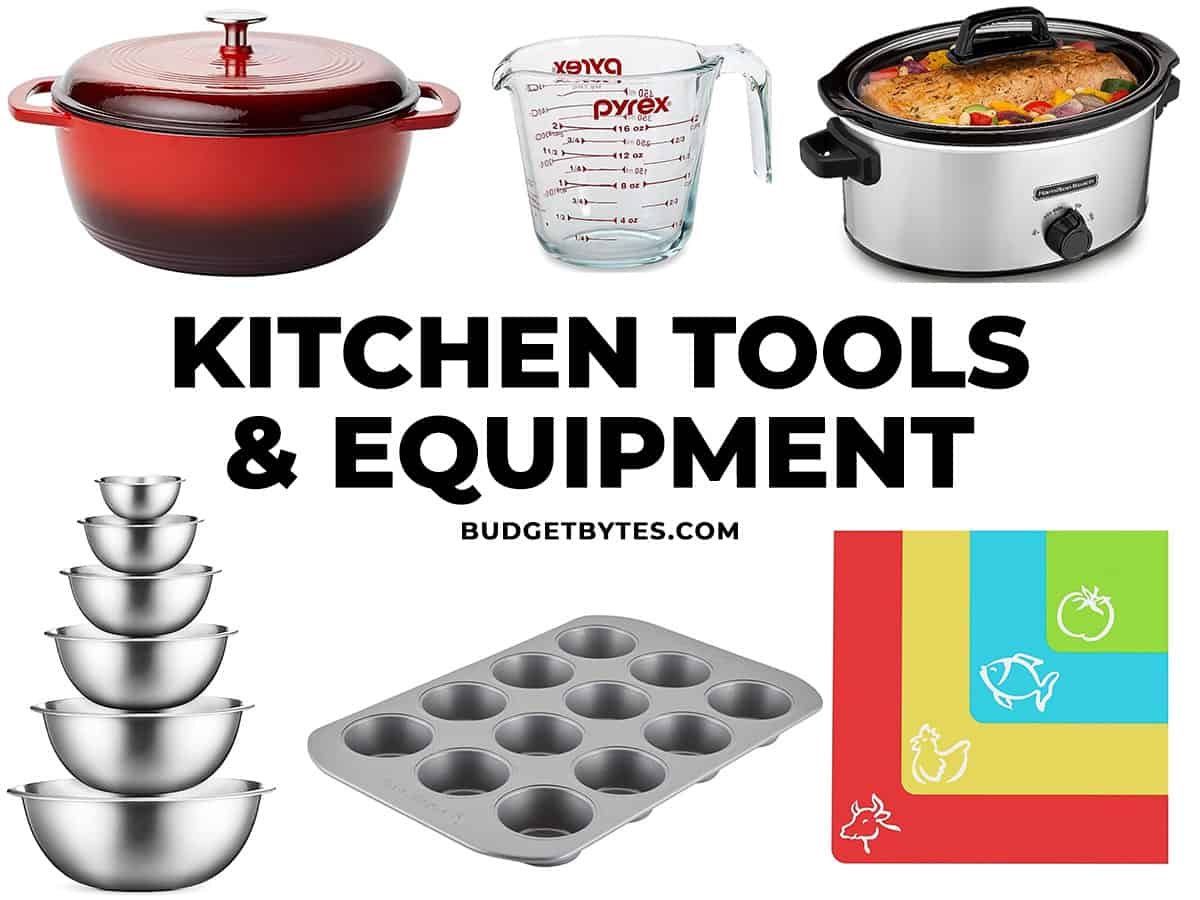 Common essential baking tools that require material-specific care to maintain performance
Credit: www.budgetbytes.com
Common essential baking tools that require material-specific care to maintain performance
Credit: www.budgetbytes.com
Daily & Post-Use Maintenance Habits
Consistent small habits after each baking session prevent 90% of common tool damage, from rust to warping. Incorporate these steps into your post-bake routine to cut down on deep cleaning time and extend your tool’s lifespan:
Immediate Post-Bake Cleanup Steps
Never let batter, dough, or burnt residue sit on tools for hours, as it will harden and become nearly impossible to remove without abrasive scrubbing. For metal baking sheets with burnt sugar or grease, let the sheet cool slightly (hot water will warp thin metal sheets) then soak in warm, soapy water for 5–10 minutes to loosen residue before scrubbing with a non-abrasive sponge. For silicone mats, wipe off excess grease with a paper towel immediately after use, then wash with warm soapy water to prevent sticky buildup. Stand mixers should be wiped down with a damp cloth after each use to remove flour dust that can clog motor vents and cause overheating over time. In practice, skipping this 2-minute wipe-down is the most common cause of stand mixer motor failure.
Handling Best Practices to Prevent Damage
Always use the right tool for the job to avoid unnecessary wear: never use a metal knife on non-stick surfaces, don’t use a glass mixing bowl as a cutting board, and avoid using a wooden rolling pin on rough countertops without a silicone mat or parchment paper underneath. Drop impact can dent thin metal sheets or crack ceramic bakeware, so handle heavy tools like cast iron pans with both hands when moving them in and out of the oven.
Quick Pre-Use Damage Checks
Before each baking session, do a 30-second scan of your tools: check metal pans for rust spots, inspect non-stick coatings for scratches, and make sure wooden utensils don’t have deep cracks that can harbor bacteria. Catching small damage early prevents it from worsening, and ensures your tools won’t affect the quality of your baked goods.
 Organized tools reduce clutter and prevent damage from rough handling
Credit: www.cleanipedia.com
Organized tools reduce clutter and prevent damage from rough handling
Credit: www.cleanipedia.com
Material-Specific Cleaning Techniques
Using the wrong cleaner can damage your tools faster than regular wear and tear. Match your cleaning products to your tool’s material for the best results:
Safe Cleaning Products for Every Material
For most tools, mild dish soap and warm water are sufficient for regular cleaning. For tough burnt-on residue on stainless steel or glass, a paste of baking soda and water works as a gentle abrasive that won’t scratch surfaces. White vinegar is ideal for deodorizing silicone and removing mineral deposits from metal tools. Avoid using oven cleaner, bleach, or steel wool on any bakeware, as these harsh chemicals will degrade non-stick coatings, etch metal surfaces, and damage wood.
Natural Stain Removers
For stubborn stains from burnt sugar, tomato sauce, or turmeric, these natural solutions work without harsh chemicals:
- Baking soda paste: Mix 3 parts baking soda with 1 part water, apply to the stain, let sit for 15 minutes, then scrub with a non-abrasive sponge.
- White vinegar soak: Soak stained metal or silicone tools in undiluted white vinegar for 30–60 minutes to break down acidic residue.
- Lemon + salt scrub: For wooden tools with lingering odors, rub with half a lemon and a sprinkle of coarse salt, let sit for 10 minutes, then rinse and dry immediately.
Commercial Cleaner Guidance
For stains that natural methods can’t lift, opt for food-safe, non-abrasive commercial cleaners. Bar Keepers Friend is a popular option for stainless steel and glass bakeware, but always test it on a small, hidden area first to avoid discoloration. Avoid all-purpose cleaners with bleach or ammonia, as they can leave toxic residues that transfer to food. For a visual walkthrough of tackling burnt-on sugar and grease on baking sheets, this step-by-step video guide demonstrates safe, non-abrasive techniques that won’t damage your gear: Step-by-step stain removal video
Extending the Life of High-Value Bakeware
Specialty bakeware and small appliances require extra care to maintain their performance and longevity. Follow these guidelines to keep high-investment tools in top shape for years:
Non-Stick Pan & Mat Care
After washing non-stick pans or silicone mats, apply a thin layer of cooking oil (canola, vegetable, or avocado oil work well) to the surface, then heat on low for 1–2 minutes to let the oil seep into micro-scratches in the coating. This simple step reduces sticking and extends the non-stick lifespan by up to 50% for many brands. Never stack non-stick pans directly on top of each other; place a parchment paper liner between them to avoid scratching the coating.
Cast Iron & Carbon Steel Bakeware Maintenance
Cast iron Dutch ovens and carbon steel baking sheets require regular seasoning to build a protective, non-stick layer. After cleaning (never soak these tools, and avoid dish soap for new, unseasoned pieces), dry immediately with a clean towel, then rub a thin layer of food-grade oil over the entire surface. Place in a 300°F (149°C) oven for 1 hour, then let cool and wipe off excess oil. Repeat this process every 2–3 months, or immediately if you notice rust spots forming.
Stand Mixer & Small Appliance Care
Stand mixers, hand mixers, and food processors are major investments for home bakers, and regular maintenance prevents costly repairs. Wipe down the exterior and mixing attachments after each use to remove flour and batter buildup. Every 3 months, check the speed control dial for flour dust that can clog the mechanism, and lubricate moving parts per the manufacturer’s instructions. KitchenAid’s official stand mixer care guidelines recommend tightening the mixing attachment hub monthly to prevent wobbling during use.
Seasonal & Long-Term Storage Best Practices
How you store your baking tools when they’re not in use has a huge impact on their condition, especially if you live in a humid climate or only bake during the holiday season. Follow these tips to keep your gear in perfect shape between uses:
Organizing Your Baking Space
Assign a dedicated storage space for all baking tools—whether that’s a lower cabinet, a pantry shelf, or a pegboard on your kitchen wall—to avoid rummaging through drawers and causing accidental damage. Use drawer dividers to separate delicate tools like pastry brushes from heavy metal pans, and label bins for seasonal items like holiday cookie cutters or specialty Bundt pans to make them easy to find. Hanging frequently used tools like whisks, spatulas, and pastry blenders on hooks saves drawer space and prevents them from getting bent or dented when stacked.
Climate Control for Sensitive Tools
Moisture is the #1 enemy of baking tools, causing rust on metal, warping on plastic and silicone, and cracking on wood. If you store your tools in a damp basement or pantry, place silica gel packets in storage bins to absorb excess moisture. Avoid storing metal or wooden tools under the kitchen sink, where humidity from dishwashing is highest. For kitchens with high heat (like those with ovens that run warm), keep heat-sensitive items like silicone mats and plastic measuring cups away from direct oven vent heat to prevent warping.
:strip_icc()/202205MB_79357-2143e96dec8642b99fe5e6cd3ec7c6a5.jpg) Proper storage prevents damage, rust, and makes tools easy to find mid-bake
Credit: www.bhg.com
Proper storage prevents damage, rust, and makes tools easy to find mid-bake
Credit: www.bhg.com
Expert-Approved Maintenance Do’s and Don’ts
After years of testing care routines across hundreds of tool types, baking experts agree on a core set of do’s and don’ts to avoid common damage:
Do’s for Long-Lasting Tools
- Dry all tools immediately after washing, either with a clean towel or by air-drying in a well-ventilated space away from direct sunlight.
- Inspect tools for rust, scratches, or cracks before each use, and address small damage immediately before it worsens.
- Use material-appropriate cleaners: mild soap for most tools, baking soda for tough stains on metal/glass, and food-grade mineral oil for wooden and cast iron tools.
- Oil wooden and cast iron tools quarterly to prevent drying and cracking.
- Follow manufacturer care guidelines for specialty tools, especially high-investment items like stand mixers and premium non-stick bakeware.
Don’ts That Cause Premature Damage
- Never soak wooden, cast iron, or carbon steel tools in water for more than 5 minutes, as prolonged exposure causes warping, rust, and cracking.
- Avoid abrasive scouring pads, steel wool, and harsh chemical cleaners (oven cleaner, bleach) on all bakeware, as they degrade coatings and scratch surfaces.
- Never store damp tools, even for short periods, as moisture leads to rust and bacterial growth.
- Don’t put carbon steel, cast iron, wooden, or uncoated non-stick tools in the dishwasher, as high heat and harsh detergents will damage them.
- Avoid stacking heavy items on top of delicate silicone mats or glass bakeware, as this can cause warping or cracking.
Frequently Asked Questions
How often should I deep clean my baking tools?
Wipe down tools after each use, deep clean monthly for frequently used items, and deep clean specialty bakeware (like Bundt pans, pastry brushes) every 3 months, or immediately after use if they have burnt-on residue.
Can I put all baking tools in the dishwasher?
No. Wooden utensils, cast iron bakeware, carbon steel baking sheets, and non-stick pans should always be hand washed, as dishwashers’ high heat and harsh detergents can warp, crack, or degrade coatings. Stainless steel, glass, and food-grade silicone are generally dishwasher safe, but check the manufacturer’s guidelines first.
How do I remove rust from metal baking tools?
For small rust spots, make a paste of baking soda and water, apply to the rust, let sit 30 minutes, then scrub with a non-abrasive sponge and rinse thoroughly. For larger rust patches, soak the tool in white vinegar for 1–2 hours, then scrub. Dry immediately and apply a thin layer of mineral oil to prevent future rust. If rust has pitted the metal, replace the tool to avoid bacterial growth.
Is re-seasoning non-stick bakeware necessary?
Traditional PTFE (Teflon) non-stick pans do not require re-seasoning, but applying a thin layer of cooking oil after washing and heating for 1–2 minutes can extend their non-stick lifespan. Ceramic non-stick coatings benefit from occasional oiling as well, as the natural oils fill in micro-scratches to maintain performance.
Conclusion
Consistent, material-specific care for your baking tools doesn’t just extend their lifespan—it ensures every recipe you make turns out perfectly, without off-flavors or uneven baking caused by damaged gear. By adopting the daily habits, cleaning routines, and storage practices outlined above, you’ll save money on replacement tools, reduce food safety risks, and make your baking routine smoother and more enjoyable. Bookmark this guide for your next deep clean, and share your favorite tool care hack in the comments below!

I’m Abby Lu, a passionate home cook who loves simplifying everyday meals. At PlugChef.com, I share product reviews and cooking guides to help you find the best tools for your kitchen.
Related posts:
 Side Dish for Rack of Lamb: Perfect Pairings Unveiled
 Yamazaki Home 2608 Dish Drainer: Sleek Kitchen Essential
 Hidden Dish Drying Rack Ideas: Space-Saving Solutions
 Kraus Roll Up Dish Drying Rack: Space-Saving Kitchen Essential
 Do Blenders Sunglasses Have a Warranty? Uncover the Truth
Are Kitchen Aid Appliances Good: Discover the Truth
Do Blenders Sunglasses Have a Warranty? Uncover the Truth
Are Kitchen Aid Appliances Good: Discover the Truth

