
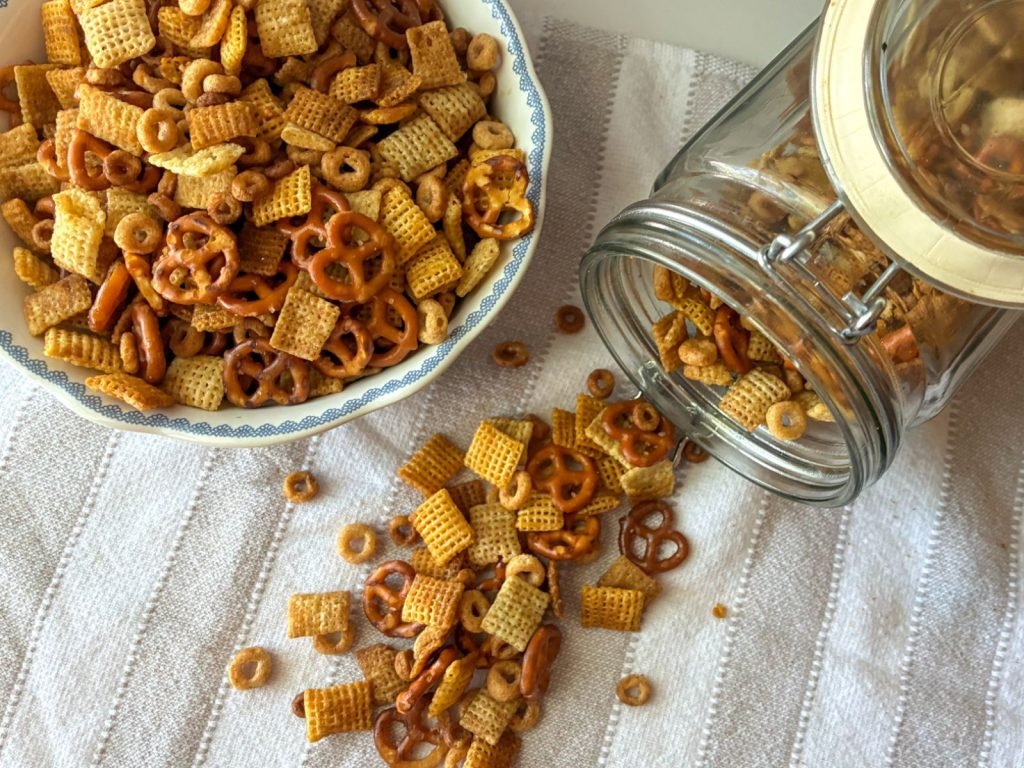
If you’ve ever bitten into a crunchy, savory handful of Chex Mix at a party, game day gathering, or road trip stop, you know why this snack has remained a beloved staple for decades. Unlike pre-packaged versions loaded with preservatives, or stovetop mixes that often end up unevenly cooked or soggy, oven-baked traditional Chex Mix delivers consistent, golden crispness and deep, savory flavor with minimal active prep time. This tested, beginner-friendly recipe uses pantry staples you likely already have on hand, and you can customize the seasoning to suit any taste preference, from mild and kid-friendly to spicy and smoky. Whether you’re hosting a crowd or just need a quick, satisfying snack to keep on hand, this recipe will quickly become a go-to in your kitchen.
 Freshly baked Chex Mix, tossed with Worcestershire and garlic seasoning, ready to serve.
Credit: houseofnasheats.com
Freshly baked Chex Mix, tossed with Worcestershire and garlic seasoning, ready to serve.
Credit: houseofnasheats.com
Why Oven-Baked Traditional Chex Mix Beats Other Methods
Many home cooks try making Chex Mix in the microwave or on the stovetop, but both methods come with consistent drawbacks. Microwave versions often end up with burnt edges and soft, undercooked centers, while stovetop mixes require constant stirring and are prone to uneven seasoning distribution. The low, slow oven-baking method solves both problems: the steady, even heat toasts every piece of cereal, nut, and pretzel to perfect crispness without burning the butter or seasoning coating. As an added bonus, baking Chex Mix in the oven fills your entire kitchen with a warm, savory aroma that makes waiting for it to finish almost as fun as eating it.
Ingredients for Perfect Savory Chex Mix
The secret to a balanced, flavorful Chex Mix lies in using the right combination of cereals, add-ins, and seasonings, with precise ratios to avoid sogginess or overpowering flavors. Below is a breakdown of each component, plus substitutions for common dietary restrictions.
The Cereal Base
The foundation of any traditional Chex Mix is a blend of three core Chex cereals, each contributing a unique texture and flavor:
- Rice Chex: Light, airy, and porous, it absorbs the seasoning coating perfectly without losing its crispness, even after long baking times.
- Corn Chex: Sturdy and slightly sweet, it holds up well to stirring and adds a satisfying, hearty crunch that contrasts nicely with the savory seasoning.
- Wheat Chex: With a subtle nutty flavor and denser texture, it adds depth to the mix and prevents it from feeling too light or one-note.
For a gluten-free version, swap Wheat Chex for an extra cup of Rice Chex, or use a certified gluten-free Chex blend. Stick to a 2:2:2 ratio of Rice:Corn:Wheat Chex for the classic flavor balance.
Crunchy Add-Ins
The cereals are complemented by salty, crunchy add-ins that add texture and extra savoriness. For a standard 10-cup batch of mix, use:
- 2 cups unsalted mixed nuts (peanuts, almonds, cashews, or pecans work best; skip if making nut-free)
- 2 cups mini pretzels (pretzel sticks work too, but mini pretzels coat more evenly)
- 1 cup cheese crackers (like Cheez-Its, for an extra salty, cheesy depth)
Optional add-ins for a gourmet twist include 1 cup of broken bagel chips, 1 cup of rye crisps, or 1 cup of roasted chickpeas for extra protein.
Savory Seasoning Blend
The seasoning is what transforms plain cereals and nuts into addictive Chex Mix. For a standard batch, you’ll need:
- 1/2 cup melted unsalted butter (salted butter works too; reduce added salt by 1/4 tsp if using salted)
- 2 tbsp Worcestershire sauce (low-sodium works for a less salty option; this adds the signature umami backbone of traditional Chex Mix)
- 1 tsp garlic powder
- 1 tsp onion powder
- 1 tsp celery salt
- 1/2 tsp freshly ground black pepper
- 1/4 tsp cayenne pepper (optional, for heat)
- 1 tsp smoked paprika (optional, for smoky depth)
A common mistake is adding too much Worcestershire sauce, which makes the mix soggy instead of crispy. Stick to the 2 tbsp ratio for the best results, and if you want a stronger umami flavor, add an extra 1 tsp of soy sauce instead of more Worcestershire.
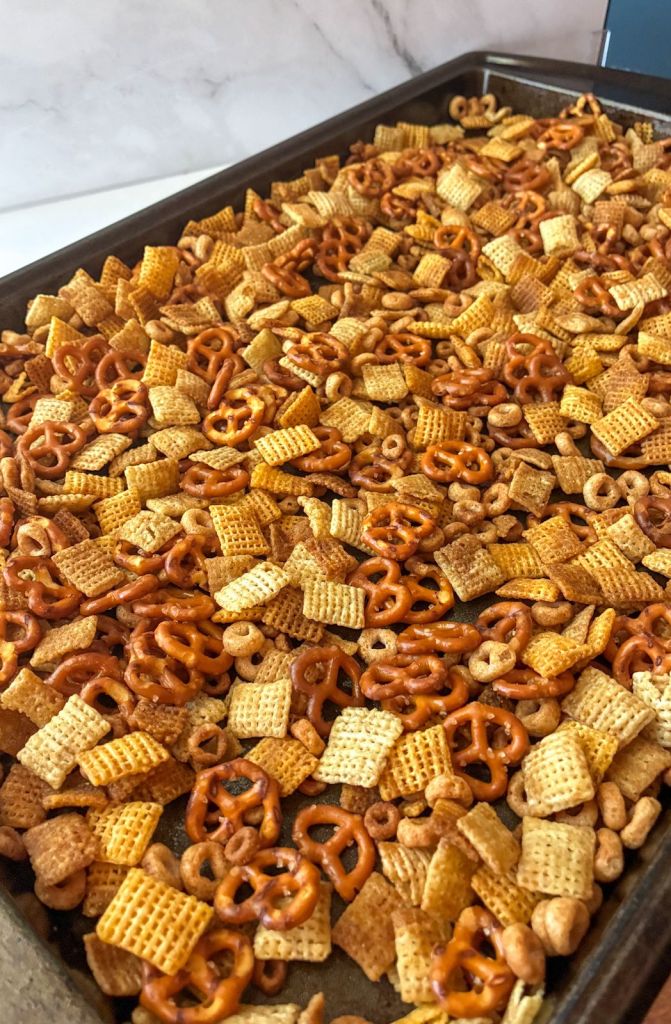 Dry mix ingredients combined before adding the savory butter and Worcestershire coating.
Credit: oursliceofhome.com
Dry mix ingredients combined before adding the savory butter and Worcestershire coating.
Credit: oursliceofhome.com
Step-by-Step Oven Baking Instructions
Following these steps will ensure your Chex Mix comes out evenly crispy, with no burnt bits or soggy spots.
Prep Work First
Start by preheating your oven to 250°F (120°C) — this low temperature is non-negotiable, as high heat will burn the butter and cereals before the mix is fully crispy all the way through. Line two large rimmed baking sheets with parchment paper or silicone baking mats for easy cleanup and to prevent sticking. While the oven preheats, use a sturdy kitchen cleaning brush to wipe any crumbs from your mixing bowl to avoid extra debris in your final mix.
Combine and Coat the Mix
In a very large mixing bowl (at least 6 quarts, to give you room to toss without spilling), combine the 6 cups of Chex blend, 2 cups of nuts, 2 cups of pretzels, and 1 cup of cheese crackers. Gently stir to distribute the ingredients evenly. In a separate small microwave-safe bowl, melt the butter in 30-second bursts, stirring between each burst to avoid browning. Whisk the Worcestershire sauce and all dry seasonings into the melted butter until fully combined, with no lumps. Pour the seasoning blend over the dry mix, then use a large rubber spatula or two sturdy wooden spoons to toss very gently, making sure every piece is coated without crushing the pretzels or cereals.
Bake for Perfect Crispiness
Spread the coated mix in an even, single layer across the two prepared baking sheets — don’t pile it high, as overcrowding will cause the mix to steam instead of toast, leading to sogginess. Bake for 1 hour total, stopping every 15 minutes to stir the mix and rotate the pans between the upper and lower oven racks for even cooking. After 45 minutes of baking, taste a piece: if it’s crispy all the way through with no soft spots, it’s done. If it’s still slightly soft in the center, bake for 5-10 more minutes, watching closely to avoid burning.
 Freshly baked Chex Mix cooling on a parchment-lined baking sheet before storage.
Credit: www.saengskitchen.com
Freshly baked Chex Mix cooling on a parchment-lined baking sheet before storage.
Credit: www.saengskitchen.com
Pro Tips for Extra Crunch Every Time
Getting that perfect, consistent crunch is easier than you think with a few simple adjustments to the basic recipe.
Avoid Common Sogginess Mistakes
The most common cause of soggy Chex Mix is overcrowding the baking sheets, which traps steam and prevents the mix from toasting evenly. If you only have one baking sheet, halve the recipe to avoid piling the mix too high. Another common mistake is skipping the oven preheating step: putting the mix in a cold oven will steam it instead of toasting it, leading to soft, chewy bits instead of crisp ones. Finally, never store the mix while it’s still warm — residual steam will make it soggy within hours. Let it cool completely on the baking sheets for 20-30 minutes before transferring to a storage container.
Customization Ideas for Every Taste
One of the best parts of homemade Chex Mix is how easy it is to tailor to your preferences. For a spicy version, add 1 tsp chili powder and 1/2 tsp cayenne to the seasoning blend. For a cheesy upgrade, sprinkle 2 tbsp of grated Parmesan over the mix during the last 10 minutes of baking. If you’re making the mix for someone with nut allergies, swap the nuts for extra pretzels or 1 cup of roasted, seasoned chickpeas. For a low-sodium version, use low-sodium soy sauce instead of Worcestershire, and skip the added salt, relying on the celery salt and onion powder for flavor.
This mix is a staple for game days, potlucks, and holiday parties, and if you’re hosting families with young children, no-drill childproof cabinet locks are a simple way to keep snack stashes out of reach of curious toddlers.
Serving and Storage for Long-Lasting Freshness
Proper handling after baking is key to keeping your Chex Mix crispy for days.
Serving Suggestions
Chex Mix is incredibly versatile when it comes to serving. It works as a standalone snack for movie nights, a party platter staple for game days and potlucks, or even a crunchy topping for salads, soups, and mac and cheese. For a fun party spread, serve the mix alongside fresh fruit and veggie sticks, and use a kitchen cleaning scrub brush to quickly clean up any crumbs after guests leave. If you’re prepping snacks for a kids’ party, make a mild version without cayenne, and pair it with other kid-friendly treats.
Storage Best Practices
Once your Chex Mix is completely cooled, transfer it to an airtight glass or plastic container with a tight-sealing lid. Per USDA food safety guidance, homemade shelf-stable snacks like Chex Mix stay fresh and safe to eat for up to 2 weeks when stored at room temperature away from direct sunlight and heat. For longer storage, freeze it in a freezer-safe zip-top bag for up to 3 months; thaw at room temperature for 30 minutes before serving, with no need to reheat.
Avoid storing Chex Mix in the refrigerator, as the cold, moist environment will make it soggy within 24 hours. If you notice any clumping after storage, just toss the mix gently before serving to separate the pieces. If you’re organizing your kitchen pantry to store snack staples, childproof drawer locks can keep snack bins sealed away from kids and pets.
For stuck-on butter and seasoning on your baking sheets after baking, a heavy-duty kitchen cleaning brush cuts through grease without scratching non-stick surfaces, making cleanup fast and easy. If you’re making a mild version for younger eaters, skip the cayenne and pair the mix with other kid-friendly snacks, and make sure all kitchen storage has child safety latches for cabinets to keep unsafe foods out of reach.
Frequently Asked Questions
What ingredients are in traditional Chex Mix?
The core of traditional Chex Mix is a blend of three Chex cereals: Rice Chex, Corn Chex, and Wheat Chex, paired with salty add-ins like mini pretzels, mixed nuts, and cheese crackers. The savory coating is made with melted butter, Worcestershire sauce, garlic powder, onion powder, celery salt, and black pepper. Most recipes avoid sweet ingredients, keeping the mix entirely savory, though home cooks often add custom spices or swaps for dietary needs like gluten-free cereals or nut-free add-ins.
How do you make Chex Mix in the oven?
Oven-baked Chex Mix uses a low, slow cooking method to avoid burning. First, combine your dry ingredients (cereals, pretzels, nuts, crackers) in a large bowl. In a separate bowl, whisk together melted butter, Worcestershire sauce, and dry seasonings until smooth, then pour over the dry mix and toss gently to coat. Spread the mix in an even layer on two parchment-lined baking sheets and bake at 250°F (120°C) for 1 hour, stirring and rotating the pans every 15 minutes. Let cool completely before serving or storing.
Can I customize the seasoning for Chex Mix?
Absolutely! Customization is one of the best parts of homemade Chex Mix. For a spicy kick, add 1/4 tsp cayenne pepper or 1 tsp chili powder to the seasoning blend. For a smoky flavor, stir in 1 tsp smoked paprika or a dash of liquid smoke (reduce Worcestershire by 1 tsp to avoid sogginess). For a cheesy upgrade, sprinkle 2 tbsp grated Parmesan over the mix during the last 10 minutes of baking. If you don’t have Worcestershire sauce, swap it for an equal amount of low-sodium soy sauce, though this will make the mix slightly darker and saltier—reduce any added salt by 1/4 tsp to compensate.
How long does homemade Chex Mix last?
When stored properly in an airtight container at room temperature, homemade Chex Mix stays fresh and crispy for up to 2 weeks. For longer storage, freeze it in a freezer-safe zip-top bag for up to 3 months; thaw at room temperature for 30 minutes before serving, no reheating needed. Avoid storing it in the refrigerator, as moisture will make the mix soggy within 24 hours. If you notice a stale aroma or soft texture, it’s best to discard the mix.
Can I make Chex Mix ahead of time for a party?
Yes! This recipe is perfect for advance prep. Bake the mix 2-3 days before your event, store it in an airtight container at room temperature, and it will stay just as crispy as the day you made it. Avoid adding any fresh ingredients like herbs or grated cheese more than a day in advance, as these can lose their flavor and texture over time.
Conclusion
Oven-baked traditional Chex Mix is a foolproof, crowd-pleasing snack that beats store-bought versions every time: you control the salt level, skip the artificial preservatives, and can customize the flavor to suit any taste preference. It’s perfect for game days, potlucks, holiday gatherings, or even a quick late-night snack, and the low-and-slow baking method ensures every bite is evenly crispy and packed with savory flavor. This recipe is beginner-friendly, uses pantry staples you likely already have on hand, and takes minimal active time to throw together. Whether you stick to the classic seasoning or experiment with spicy, cheesy, or smoky variations, you’ll end up with a snack that disappears fast. Ready to make your own batch? This recipe comes together in under 10 minutes of active prep, and your kitchen will smell incredible while it bakes. For more easy, tested snack and party recipes, check out our blog for ideas to make your next gathering a hit.

I’m Abby Lu, a passionate home cook who loves simplifying everyday meals. At PlugChef.com, I share product reviews and cooking guides to help you find the best tools for your kitchen.
Related posts:
 How to Make a Fruit Basket for a Gift: Easy DIY Guide
 Mesh Desk Organizer With Sliding Drawer: Maximize Efficiency
 Decorative Woven Baskets for Wall: Transform Your Space
 Rubbermaid Large Dish Drying Rack: Ultimate Kitchen Solution
 Gray Kitchen With Stainless Steel Appliances: Modern Elegance
 Appliance Play Food Kitchen Toys: Ignite Imaginative Play

